
Tips + Techniques
A Technical Approach to Better Automatic Skin Tone Selections
December 1, 2022
There is no way around the fact that modern digital photography and retouching carry with them a significant amount of technical considerations that an artist should not avoid. Refusing to learn some of the technical aspects in either will hold you back from your full potential as a photographer, simply because these art tools were borne from digital technology and demand (some) technical knowledge to leverage them properly. With that said, in this article I am going to discuss some concepts regarding using Photoshop to select skin tones quickly and more accurately, the technical reasons behind it, and why it may benefit you to learn and understand it.
Skin Tones: First, Some Rudiments of Color Science
You may have heard the term “color science” thrown around a lot online, and maybe you have no understanding of what that means—or perhaps you’re an expert on it. In my experience, almost no one doing photography today has a highly technical understanding of color science in the digital world (from here on out, I will say “Photoshop” but understand these concepts are for digital color science in general, are used outside of Photoshop, and even predate Photoshop).
Most photographers don’t bother learning much about color science, and there is a good reason most don’t: It’s not a requirement to create incredible photographic artwork. But a little bit of knowledge can go a long way, especially when it comes to efficiency in your workflow. So let’s review some kinda-nerdy technical things you may not have considered or perhaps even knew about, and why understanding them a bit can help you in your skin tone selecting and editing. (Don’t worry, there won’t be any math).
Hue, Saturation, Brightness
These three terms are most commonly used when describing or determine a color in the digital space. While there are several ways to describe a color in the digital space (we are going to gloss over all the other different color modes, color models, color profiles, etc. for this article, and stick to HSB) most people are pretty comfortable understanding the concept of how hue, saturation and brightness describe a color.
All three have a numerical value in Photoshop: Hue is depicted in degrees(0-359), Saturation as a percentage (0-100), and Brightness as a percentage(0-100). This will all become important in a bit, so read on.
The hue can be seen as the color you might describe in the real world, such as red, blue, green, orange, pink, blue-green, baby blue, neon yellow, etc (but that’s over generalizing things a bit in Photoshop.) The hue can be thought of as the tone, the “actual perceived color” in question–sort of.
[Read: Jasmin Jade’s Embrace Boudoir Presets for Every Look and Skin Tone]
Saturation is how intense the color appears, if you will. To our eyes and brain, we might see “muted red”, but in Photoshop that’s a hue somewhere in the red range with a pretty low saturation value–kind of.
Some of us use the term luminosity rather interchangeably when describing the brightness value, though they are not exactly the same thing (I know that all sounds technical) but it can be easier to just think of it as brightness for now as how light or dark a color appears. Again, to your eyes and brain, you may see “neon pink”, but in Photoshop that’s a hue somewhere in the red range (but leaning a bit towards purple) with a very high saturation value, and a very high brightness value (where color perception is at its most obvious).
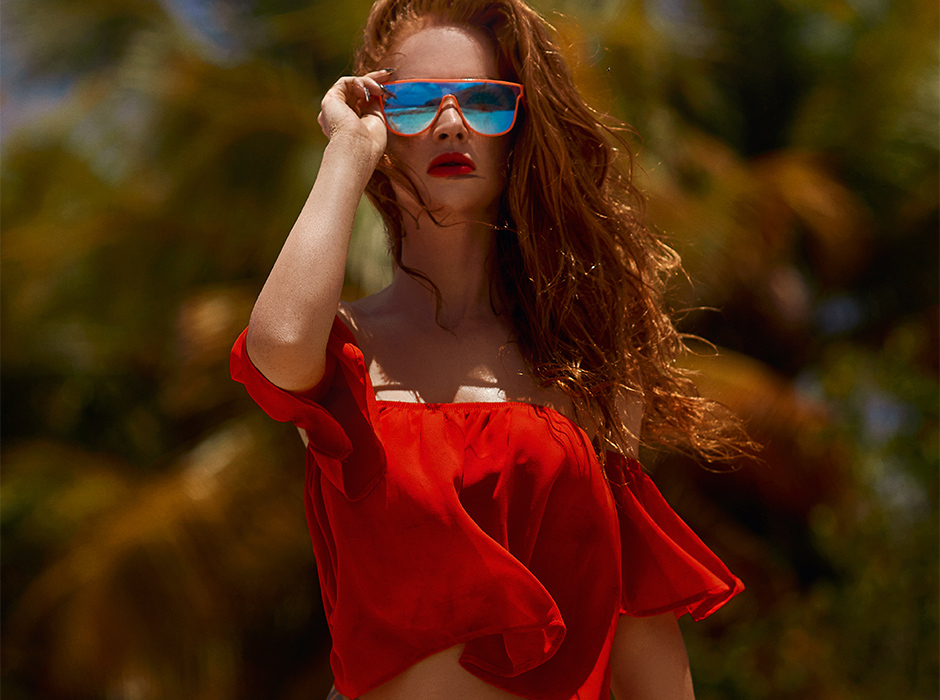
In the screenshots below, you can see how the hue (H) is at 326, which is in that red range, leaning towards purple a little. With the saturation (S) and brightness(B) pegged to 100%, “neon pink” is the resulting color.
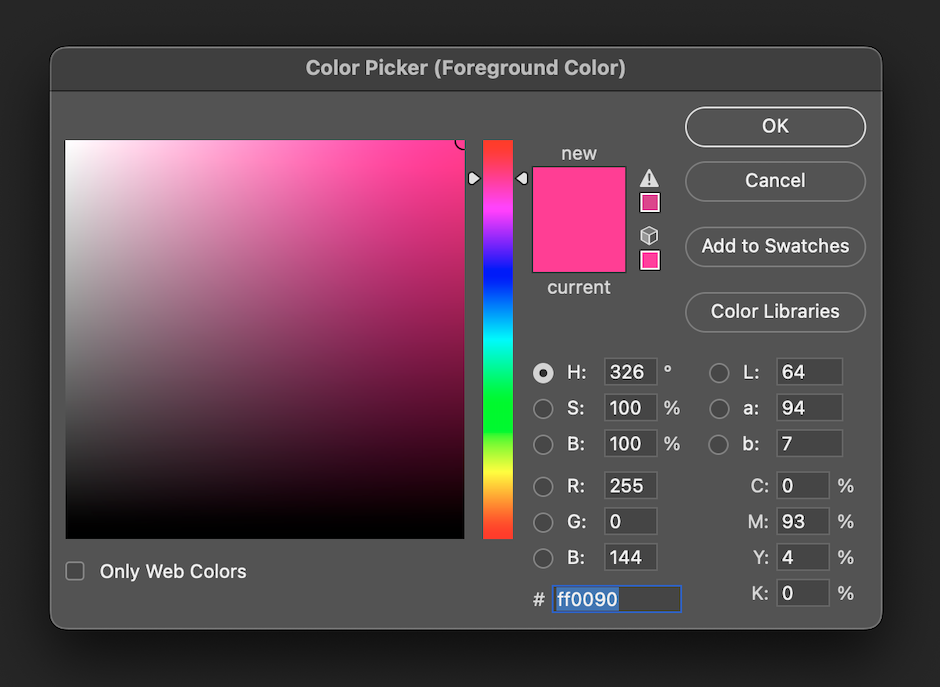
With the hue still at 326, but the saturation of 17 and the brightness of 23 (both very low values), the resulting color is deep, muted sort of burgundy. No one would see “neon pink” and “deep muted burgundy” as anywhere near the same, in terms of usefulness in your art, but just understand in this example they are the exact same hue.
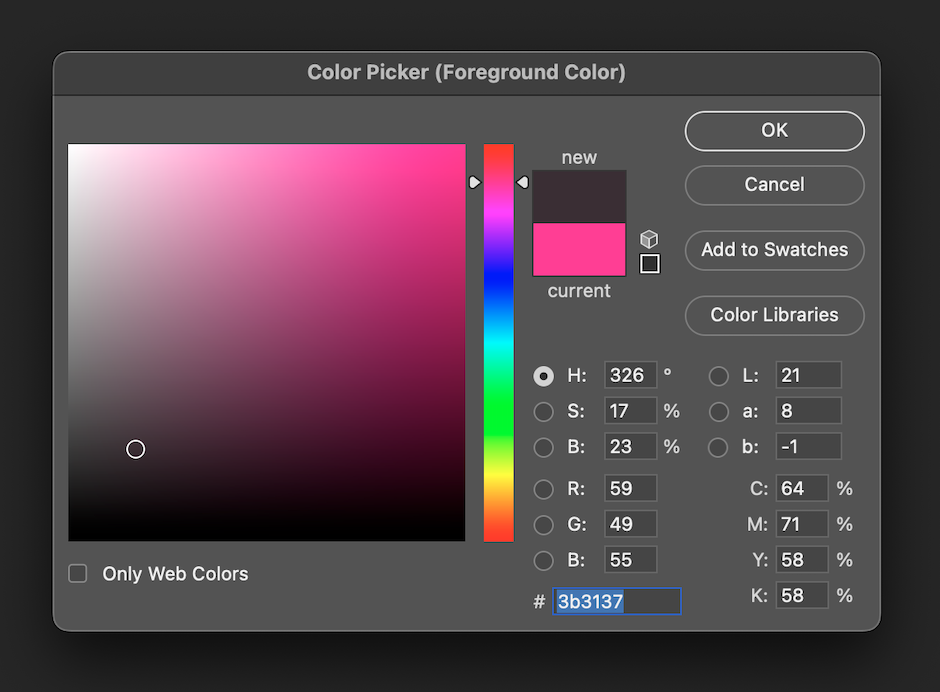
Ramp up the brightness to 87, and drop the saturation to 13, and the result is a very subdued and delicate “powder pink”. But it still has a hue of 326. Almost nothing could be more different than “neon pink” and “powder pink” but yet the hue they are built on is identical in both of these examples.
Across all of these screenshots, the hue does not change from 326, but the resulting colors appear very different to our mind’s eye. Sure, they are all a reddish pink of some form, but they are perceptively very different.
[Read: A Complete Guide to Color Effect Gels in Portrait Photography]
Ok, so here is a demonstration I want you to try yourself in Photoshop, so you can get a better understanding of the differences in real world color perception vs. the digital world.
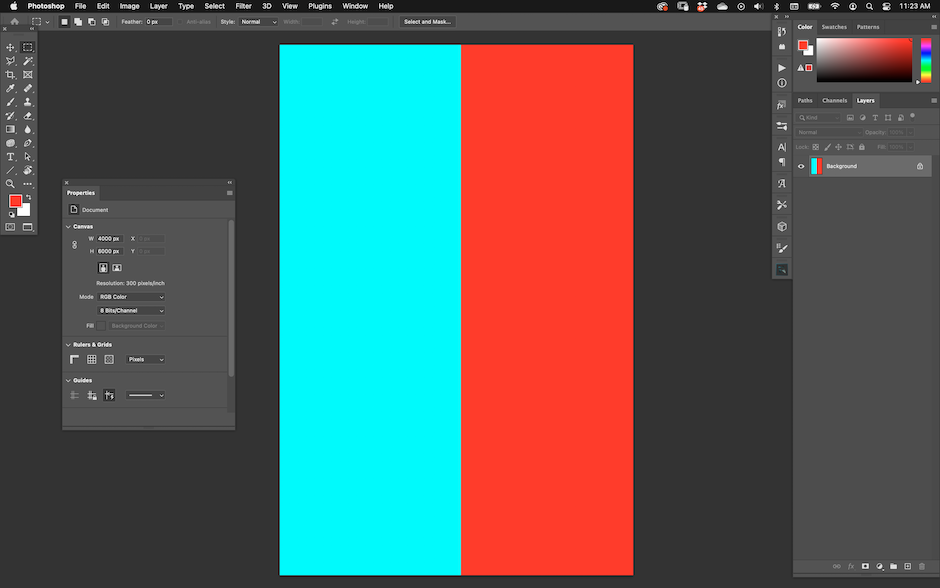
Open a blank document. Select the purest red possible (H: 0, S: 100, B: 100) and fill your document with it. Use the marquee tool to capture half of the document(give or take) and use Command/Control-I to invert the selection (be sure to deselect with Command/Control-D when done.)
You should have a document with half pure red and half pure cyan (H: 100, S: 100,B: 100).
Next, add a Hue/Saturation adjustment layer. Set the Saturation to -100 and you will see that the red and cyan become identical grey.
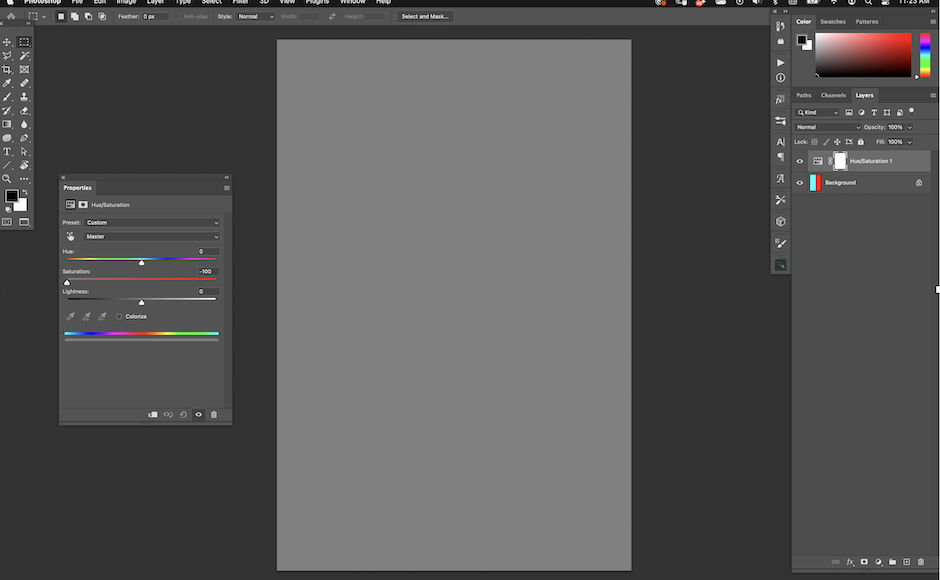
Why? Because while pure red and pure cyan are of the opposite color data, they share identical luminosity data. In other words, they look as different as possible to your mind’s eye, and you would never mistake one for the other, but they still have the exact same luminosity information in Photoshop.
So, does all this mean for you in your editing? Frankly, in and of itself, not much. HSB values don’t normally pop into your head when you are looking to make your portraits look amazing in post production, and there is no real reason to obsess on such things to make beautiful images.
[Read: Lindsay Adler’s Skin Retouching Theory and Take-Home Tips]
Why even mention this then, if you’re not interested in diving into even the simplest of color science discussion? Well, while any one of these three values can be adjusted independent of the other two, giving you great control of brightness, for example, without affecting hue or saturation, we are almost never adjusting just one hue at a time in portrait retouching. What you see in your mind’s eye as you adjust things organically(“what looks good to me”) can sometimes feel counterintuitive or even counter-productive because you’re not controlling two different and very important things independently: Color and luminosity. Said another way, chroma and luma. But what are chroma and luma and why should you care?
Chroma and Luma Separation
Before we go into it, let me just say that there are different ways to go about controlling your color (chroma) and your luminosity (luma) independently. Photoshop adjustment layers, for example, can be set to Blend Modes of “Color”or “Luminosity” (appropriately named) so you can control chroma or luma with said adjustment layer. Useful, to be sure, but sometimes a little more direct separation is ideal.
Why would you want to separate your chroma and luma in an image in Photoshop?The most useful purpose is “dialing in” the exact color (hue/saturation) you want in an area, without getting muddled up in the luminosity (brightness) of the area–a common problem when you do things just by eye (organically) as alluded to above.There are also creative reasons why separating chroma and luma is great, but let’s review some correction uses.
Where can things go wrong in your editing when you don’t consider color and luminosity separately?
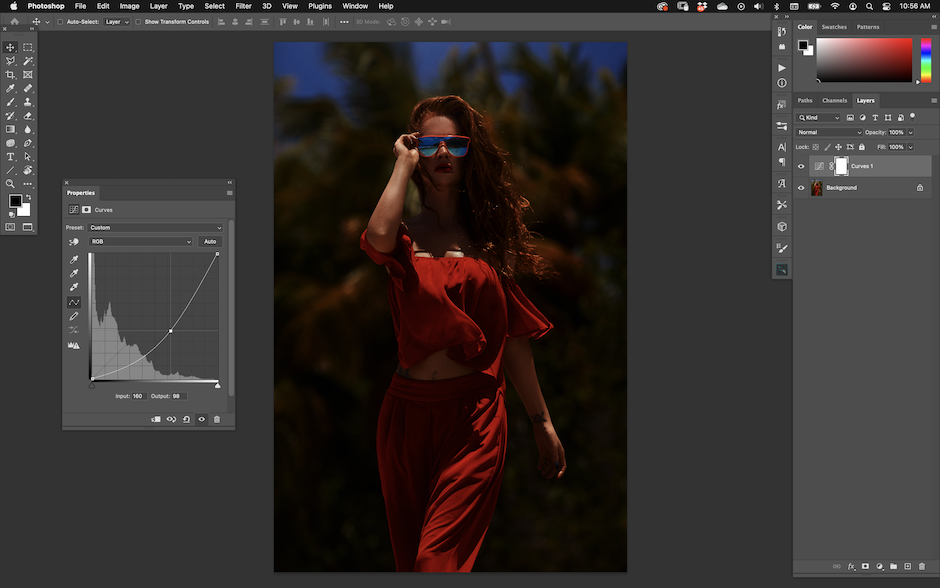
Let’s say you add a Curves adjustment layer with the idea to darken the image, and when you do, the saturation of your colors increase along with the darkening effect, which you did not want or expect. Using Luminosity blend mode on your Curves layer solves that for the most part.
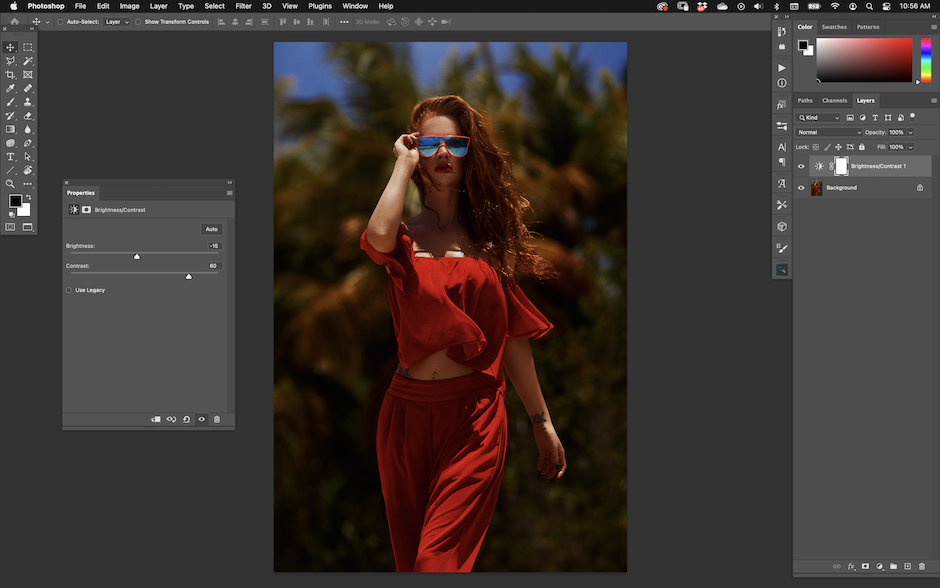
Add a Brightness & Contrast adjustment layer with the idea of increasing overall contrast on your image (or area of an image) and the same things happens as with the Curves mentioned above. Can be resolved the same way, too: change your blend mode to Luminosity.
But those are pretty direct, and have quick solutions. What about something a little more nuanced and challenging?
One of the most frustrating examples is when you use the Color Range function to select “Skin Tones” but Photoshop misses a lot of the skin on your subject because the luminosity levels vary wildly (such as inside deep shadows)giving Photoshop the false idea that those very dark colors are not “skin tones”. As seen in the sample here, even a high “fuzziness” setting of 92 does not select the skin tones very accurately.
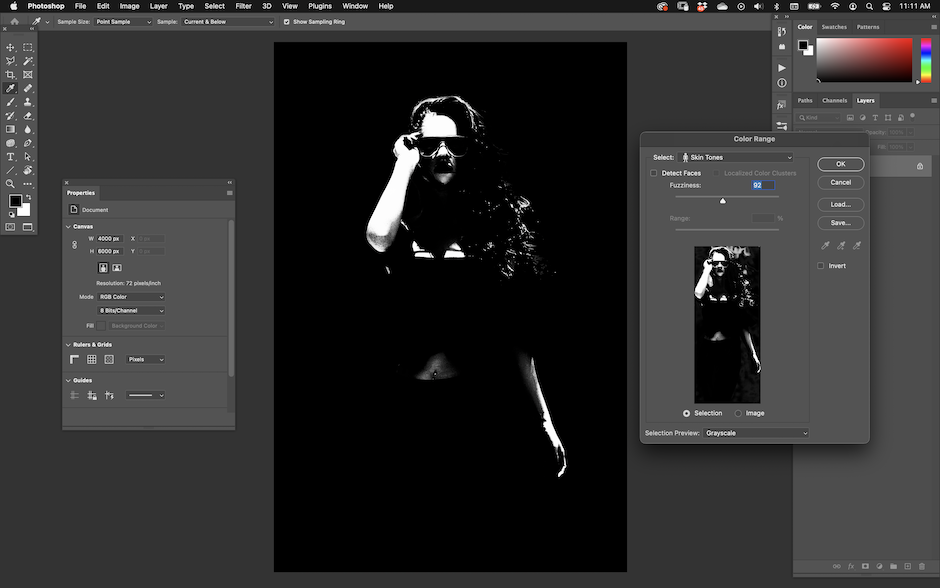
What is a possible solution? You can split the chroma and luma information, and extract the skin tones from just the chroma layer!
How would that work?
First, let’s look at one example of what a chroma layer even looks like, and I’ll attempt to explain what it is you’re looking at.
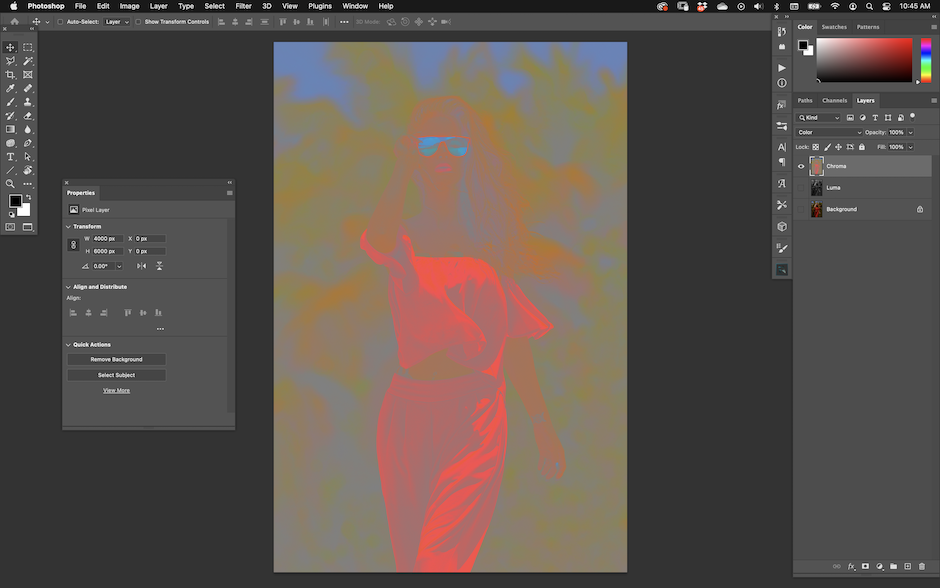
Pretty wild looking, right? This type of chroma layer shows the color data in hues (pretty obviously seen) but the saturation is now depicted from neutral grey (0% S) on up to maximum saturation (100% S) of whatever given hue, and everything in between.
What happened to the shadows, highlights, light shaping etc? That all was “removed” and can exist in its own luma layer (which I will cover in future articles, along with more chroma layer uses).
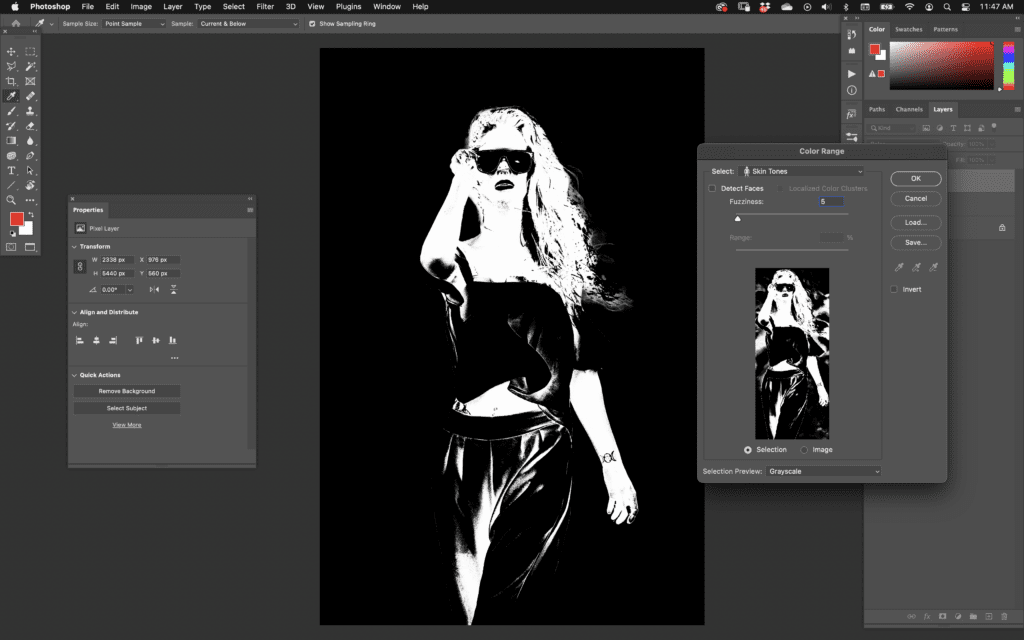
With chroma extracted, we can run Color Range / Skin Tones again, giving Photoshop a new way to “look” at the image to find skin tones. Because shadows and highlights are minimized or removed from this information, Photoshop can “see inside” deep shadows and bright highlights, giving it a better idea of where “skin tones” exist.
Bear in mind, I do not know what specific parameters Photoshop’s Skin Tones selection function is set to in the code, but when you feed it chroma data only, it usually creates a far more accurate selection, as seen here.
With chroma data, we can use a tighter more refined “fuzziness” level of 5 and still have more accurate skin tone selected, instantly, even in the deepest shadows.
Important note: In both examples above, I used Photoshop’s Subject selection function first, in order to avoid selecting skin tones in the background when making a mask. You should do Subject selection first with the chroma layer hidden, as the chroma layer will throw off Photoshop and it will almost certainly fail in selecting the subject.
Doing a Subject selection first also lets you quickly modify your subsequent skin tone mask to remove hair or errant areas of wardrobe, since Photoshop did a lot of the hard work for you. Either way, the skin tone mask created with chroma almost always yields a more accurate (read: useful) result, instantly.
This is just one use of a chroma layer, to be clear.
Ok, so how do you make a chroma layer? There are a few ways, but the fastest and most often seen is what I call a “grey chroma” layer, and you can make your own in a few simple steps:
- Duplicate your background or stamped layer, as you will probably want to merge this in the last step.
- Create a blank layer above that and fill it with 50% grey (go to Edit menu, under Fill with 50% Grey, if you like) or just manually fill the frame with neutral grey (H: 0, S: 0, B: 50).
- Change the blend mode of this layer to Luminosity.
- Merge that layer down with the copy of your background or stamped layer from step 1.
- Chroma layer: created!
What else to do with it? Oh, that is a series of articles just waiting to happen! I am forever finding new ways to leverage this splitting technique for corrective and creative things.
You can do a lot in Photoshop when you separate chroma, or simply approach it independently of luma, and this skin tone selection trick is just the tip of the iceberg. (Another super useful example is leveraging chroma and luma data independently when you are using frequency separation for skin correction.)
As I am sure all portrait photographers know, a great skin tone selection method can be the most powerful asset in your editing arsenal, allowing you to make corrective and creative changes to skin quickly and easily. Photoshop’s selection tools are advancing every year, and become more and more amazing with each new version. But, until we see a Skin Tone selection function with the option to extract from just chroma data, this method works phenomenally well in almost all cases.
Being able to make more accurate selections in a hyper efficient manner is just good news all around for any portrait retoucher.
If you’re interested, I do offer a powerful set of Chroma + Luma Actions for Photoshop from my NBP Retouch Tools, that create chroma/luma splits instantly and in all sorts of powerful variations too. My YouTube channel reviews those Actions, if you want to check those out first.
Regardless if a streamlined Actions set is what you want to invest in, or if you prefer to make your own, understanding the power of chroma/luma separation is a big first step in “seeing” your digital images with fresh eyes (and brain!) so you can control anything you want without fear or frustration, letting your creative side run free.
Related Articles

Why Felix Kunze Thinks We’ve Been Overcomplicating Lighting (And What He’s Doing About It)
July 24, 2025
When it comes to lighting in photography, most of us instinctively reach for soft, flattering light. We diffuse our flashes, shoot through umbrellas, and seek out cloudy days. But what if I told you that some of the most striking portraitYou know the moment: your subject is ready, you’ve got about five feet of space to work with, and the...
More »

How to Photograph Fireworks for Couples Portraits
October 24, 2024
Fireworks aren’t just for the Fourth of July! You’ll find them regularly at theme parks, sporting events, and maybe more surprisingly, at weddings. For the latter, fireworks offer photographers a wonderful opportunity to capture epic couples portraits with a truly unique backdrop. Of course, if you’re not familiar with how to photograph fireworks, there are some basic tips you’ll want...
More »

Why Top Photographers are Embracing Hard Light (And You Should, Too)
October 23, 2024
When it comes to lighting in photography, most of us instinctively reach for soft, flattering light. We diffuse our flashes, shoot through umbrellas, and seek out cloudy days. But what if I told you that some of the most striking portraits actually come from embracing hard light? That’s exactly what renowned photographer Roberto Valenzuela teaches in his groundbreaking new Dynamic...
More »
