
The Quirks of Backlighting (and How to Handle Them)
September 8, 2015
Backlighting is a huge part of my style and it’s one of my favorite lighting scenarios for bringing out a variety of moods. Over the years I’ve learned a ton through experimenting with it. Here are some quick and crucial tips I’ve gleaned over time.

All photos © Ben Sasso
RAYS
Having streaks of light peeking into your frame is a great way to add dynamic energy to your image. Whether it’s peeking out from behind something in the image or from outside the frame, make sure there is a little sliver of direct sunlight hitting your lens—this will create your rays. Your best bet is to shoot with a wider lens, which will stretch the light a bit and leave it streaking across the frame. Plus, the more you stop down your aperture, the more defined your rays will become.
HAZE
This is one of the more versatile looks you can use. Manipulate it to bring out a soft summer glow for a lighthearted lifestyle image by shooting when the sun is still in the sky, hidden just outside the frame. This will allow some of the stray light to sneak in, leaving a soft wash of light and color across your frame. For a harsher haze with more flares and light artifacts, allow the sun to shine directly into your lens (longer lenses work best for this) and you will find a haze that has a bit more substance to it.

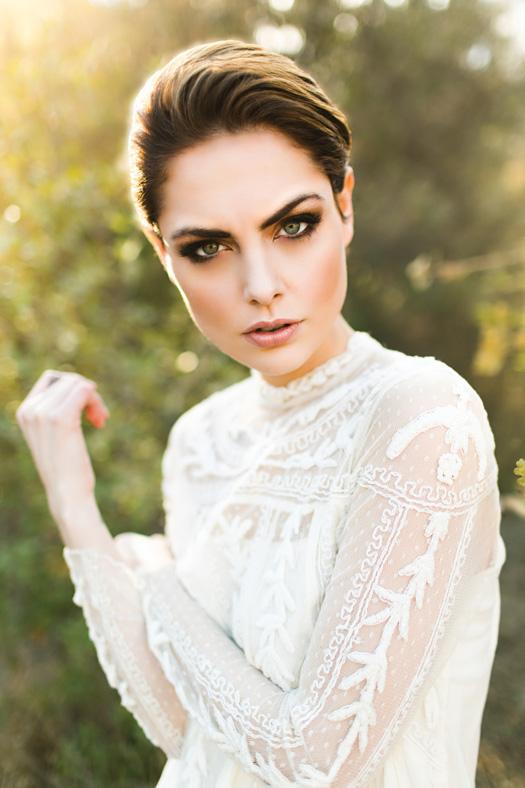
SOFT LIGHT
Shooting soft light tends to deliver a calmer, more intimate image. If you are just looking for that simple soft light, wait until the sun is just below the horizon or hidden by something (trees, mountains, buildings, etc.), and shoot with your subject completely in the shade. That will give you an ethereal, enveloping light.

Challenge: Exposing
One of the more common mistakes that photographers make when starting to shoot into the sun is that they’ll expose for the sky instead of exposing for their subject. The detail that I want to preserve is in my subject, so I overexpose the sky almost every time that I shoot backlight because the sky isn’t my main concern (sorry, sky).
Solution: Highlight Alert
I aim for the limit right before I overexpose my subject. Turn on the highlight alert on your camera. Every camera has a different way to turn it on; it can be found online (thank you, Google) or in your camera’s manual without much trouble. The highlight alert will make every pixel that’s lost detail flash on your LCD screen. If you see flashing pixels on your subject, dial down the exposure to the point right before it starts to flash. If you choose to push it further in post, the details will remain in your image either way.
Challenge: Focusing
Another difficulty you may come across when shooting into the sun is acquiring focus. With the sun beating through your lens and into the sensor, the camera will have a hard time finding the point of focus.
Solution: Recompose
I almost always have my center focus point selected and focus on my subject, and then I recompose the shot the way I want it before firing the shutter. It’s a pretty simple process that will save you a lot of frustration from waiting for your camera to focus. You just need to hide the sun, focus, bring the sun back and fire. Bam! Problem solved.
Challenge: Editing
One of the patterns I’ve noticed during my Editing and Consistency sessions is that most of the photographers I mentor think they’re shooting their backlit images incorrectly because they come out so washed out. At least half of the photographers who brought it up said that they typically just throw these images out because they can never get the “pop” back into them. Since I love backlighting, I want to put this out into the world: Don’t get discouraged! Shooting backlight will give you very flat images straight out of the camera. It’s okay. No need to panic.
Solution: Contrast
When you edit these images, bring up the contrast. If you need more, bring up the blacks slider, or bring down the shadows or midtones in your tone curve. The amount of contrast you need to bring back will vary from image to image depending on how much light was coming into your lens (which is what washes out your image), but you can expect to add a decent amount back into anything that’s backlit. The good news: it’s an easy fix!
Dig more into backlighting with Ben Sasso’s free online lighting class: lighting.bensasso.com.
Related:
10 Tips From Headshot Master Peter Hurley on Shooting Female Faces
Related Articles

Why Felix Kunze Thinks We’ve Been Overcomplicating Lighting (And What He’s Doing About It)
July 24, 2025
When it comes to lighting in photography, most of us instinctively reach for soft, flattering light. We diffuse our flashes, shoot through umbrellas, and seek out cloudy days. But what if I told you that some of the most striking portraitYou know the moment: your subject is ready, you’ve got about five feet of space to work with, and the...
More »

How to Photograph Fireworks for Couples Portraits
October 24, 2024
Fireworks aren’t just for the Fourth of July! You’ll find them regularly at theme parks, sporting events, and maybe more surprisingly, at weddings. For the latter, fireworks offer photographers a wonderful opportunity to capture epic couples portraits with a truly unique backdrop. Of course, if you’re not familiar with how to photograph fireworks, there are some basic tips you’ll want...
More »

Why Top Photographers are Embracing Hard Light (And You Should, Too)
October 23, 2024
When it comes to lighting in photography, most of us instinctively reach for soft, flattering light. We diffuse our flashes, shoot through umbrellas, and seek out cloudy days. But what if I told you that some of the most striking portraits actually come from embracing hard light? That’s exactly what renowned photographer Roberto Valenzuela teaches in his groundbreaking new Dynamic...
More »
