
Making the Grade: The 7 Steps to Color-Correcting Your Films
September 28, 2015
When using different cameras on your project or filming locations and subjects at different times, you need to make sure that your footage’s color has a consistent look and feel.
You can also leverage color to visually enhance or stylize your entire film, embuing it with anything from the deep blues and grays of a gritty Hollywood crime drama to the film stock of 1970 Kodachrome. Dealing with color can be overwhelming for filmmakers, but overcoming these challenges just requires making the proper choices during filming, and committing to some additional attention and adjustments during post-processing.
1. FLATTEN OUT
When filming with color correction in mind, your goal should be to get the lowest compression and highest quality file possible. Color correction and grading can be particularly unkind to low-quality, highly compressed footage.
If your camera supports it, film in RAW. The increased color depth and lack of compression should make RAW your first choice if you have the option. But what if your camera doesn’t offer RAW (which it likely won’t)? If you have a recent-generation Canon DSLR, you are in luck thanks to the open source Magic Lantern project. Magic Lantern is a free firmware add-on for Canon DSLRs such as the 5D Mark II and III, 6D and others. It adds a number of new features to those cameras, but for our purposes, the most important fact is that it lets these cameras shoot RAW. However, there are a few drawbacks: short record times, limited in-camera playback and random bugs. But is the quality worth the hassle?
Julien Scherliss, editor/cinematographer at Hand Crank Films thinks so: “Magic Lantern RAW is awesome. However, it’s still pretty unstable and only worth using if you aren’t afraid of the possibility that it could break your camera. But the video is absolutely incomparable quality-wise. If I was shooting a short film, didn’t have time constraints, and had no access to a camera other than my 7D, I would without a doubt shoot with Magic Lantern RAW.”
2. USE AN EXTERNAL RECORDER
If RAW isn’t available to you, another excellent option is to use an external recorder to record in the Apple ProRes codec via your camera’s HDMI output. External recorders, such as the Atomos Shogun or the Convergent Design Odyssey7, capture high-quality footage with 10-bit color depth. The lack of compression artifacts and especially the extra information made possible by capturing 10-bit color gives you the ability to do far more color work on your footage without harming it.
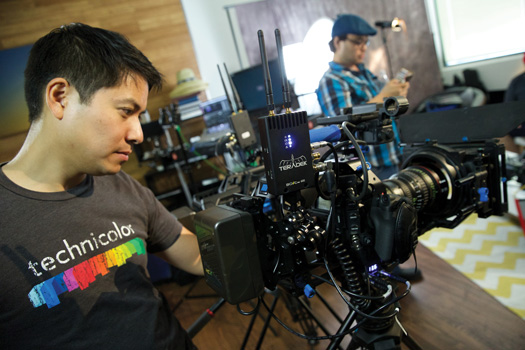
To get the best possible file out of the camera, many cinematographers, like Onyx Cinema’s Michael Shu, use external recorders like the Atomos Shogun.
Michael Shu of Onyx Cinema frequently uses the Atomos Shogun external recorder with his Sony A7s cameras to capture high-resolution footage while staying light and mobile. “Many landscape and scenic shots benefit greatly from having extra leverage in post as far as resolution and color grading. The Shogun gives me the ability to record in ProRes, and gives me the freedom to expose for the highlights and bring back shadow detail in post without introducing compression artifacting and noise,” Shu says. “The Shogun gives me a fast and easy-to-use option to record the highest quality and resolution out of any size camera.”
3. CHOOSE THE RIGHT PROFILE
So, what if you don’t have a RAW- capable camera or access to an external recorder? Your best bet is to record at the highest quality and lowest compression that your camera will allow. Then, choose the flattest, most neutral color profile available. Many newer Nikon and Canon DSLRs, for instance, support flat picture profiles for video. These files will appear desaturated out of the camera, but give you more flexibility in editing to dial in colors to your liking.
4. HIT THOSE HIGHLIGHTS
Once you have filmed your footage and everything is imported into your editor, the actual color work begins. This work will vary by your software, but there are some general principles to apply no matter what tool you choose.
Software like Red Giant’s Magic Bullet Colorista offer simple tools such as the Keyer to help you dial in your colors.
“The first step is to go through and adjust your whites, blacks and skin tones,” Scherliss says. “When you first bring your footage in, you will probably notice that some shots are brighter, some are darker, some are orange, some are bluer, and some people you shot just don’t look right. This is the nature of shooting. So the first step is not to make everything beautiful; it’s just to go through and make it all look like it was shot with the same camera, in the same world.”
Many editors like to start with the blacks first and then the whites before moving to midtones and skin tones; changes to both blacks and whites tend to impact the entire scene while changes to midtones and skin tones don’t have such a universal impact on the surrounding colors.
5. TRUST YOUR COLOR DATA (NOT YOUR EYES)
Rely on the waveform, vectorscope and parade scope information in your editing program of choice. These visual guides provide luminance, chrominance and RGB values, respectively, of your video. Similar (but not identical) to the role that a histogram plays for still image editing, these visual data points will ensure you’re editing colors consistently frame to frame.
6. FIND THE RIGHT SOFTWARE
The most common color- correction tool is something you probably already have: your non-linear editor (NLE). Both Final Cut Pro and Adobe Premier have strong color-correction tools built in. Austin Lottimer, Olympus Trailblazer and creative director at Trine Films, says, “Adobe’s release of Premiere Pro CC 2015 unloaded a number of extremely useful new coloring tools. These give editors the ability to color their video using an interface similar to the controls in Adobe’s Lightroom. This new feature will be huge for the budget filmmaker who may not have access to higher-end, dedicated color-correction suites.“
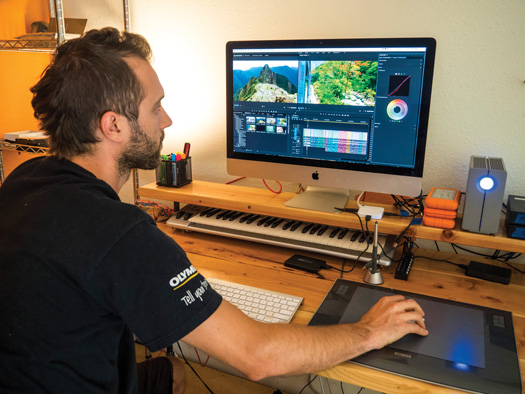
Austin Lottimer, creative director at Trine Films, has leveraged the new color-grading tools in Adobe Premier for his work.
Those dedicated color-correction suites represent the next step up from NLE correction and offer significantly more robust feature sets. Perhaps the most popular of these is Blackmagic Design’s DaVinci Resolve. Used everywhere from big-budget films to small-town wedding gigs, DaVinci Resolve is a very powerful tool that can adjust the smallest color cast, or grade an entire film into a distinct style. Pricing ranges from free for DaVinci Resolve Lite, to $1,000 for the full version and all the way up to $29,000 for the complete software and hardware suite.
7. DON’T FORGET THE PLUG-INS
Color-correction and emulation plug-ins for NLE software occupy a powerful middle ground between using just the tools provided by your NLE and owning a full color-grading and correction suite like Resolve. These plug-ins typically fall into either color-correction tools or overall color-grading “looks” for your film. Colorista from Red Giant is one of the most popular color-correction plug-ins. Available for many popular NLEs, it allows your editing program to approach the power and features available in standalone programs like DaVinci Resolve. Other plug-ins, such as FilmConvert and Red Giant’s Looks, have presets that provide a quick path to giving your footage the look of hundreds of different presets, filmstocks and classic film/TV genres. You can either use these presets as is, or tweak them to your (or perhaps your client’s) heart’s content.
Related Articles

Why Felix Kunze Thinks We’ve Been Overcomplicating Lighting (And What He’s Doing About It)
July 24, 2025
When it comes to lighting in photography, most of us instinctively reach for soft, flattering light. We diffuse our flashes, shoot through umbrellas, and seek out cloudy days. But what if I told you that some of the most striking portraitYou know the moment: your subject is ready, you’ve got about five feet of space to work with, and the...
More »

How to Photograph Fireworks for Couples Portraits
October 24, 2024
Fireworks aren’t just for the Fourth of July! You’ll find them regularly at theme parks, sporting events, and maybe more surprisingly, at weddings. For the latter, fireworks offer photographers a wonderful opportunity to capture epic couples portraits with a truly unique backdrop. Of course, if you’re not familiar with how to photograph fireworks, there are some basic tips you’ll want...
More »

Why Top Photographers are Embracing Hard Light (And You Should, Too)
October 23, 2024
When it comes to lighting in photography, most of us instinctively reach for soft, flattering light. We diffuse our flashes, shoot through umbrellas, and seek out cloudy days. But what if I told you that some of the most striking portraits actually come from embracing hard light? That’s exactly what renowned photographer Roberto Valenzuela teaches in his groundbreaking new Dynamic...
More »
