
Getting Started on Time-Lapse
September 22, 2014
Digital cameras’ ability to capture a large number of frames continuously has made the creation of time-lapse clips relatively easy. Wedding photographers can compress the whole wedding service or reception into a one- or two-minute video clip, or add some time-lapse of romantic scenes shot before the wedding.
It’s All About the Intervalometer
The first step is setting your camera on a tripod and selecting the interval between each shot using an intervalometer (a device that counts intervals of time), and then leaving the camera alone for the length of time required. For example, if you want a one-minute video clip at 24 frames per second and you want to capture two hours of action at the wedding reception, the camera will need to take a photo every five seconds.

The Pentax K-3 camera has a built-in intervalometer for recording a sequence of images. It can even assemble a time-lapse clip in the camera.
If you own a Nikon or a Pentax DSLR, you’re in luck, as an intervalometer is built in. If you shoot with a Canon, Olympus or Sony (some non-DSLRs from these three manufacturers do have intervalometers), you’ll need an external intervalometer to control the shutter firing. Most camera manufacturers offer their own models, as do several third parties. More sophisticated intervalometers can also automatically adjust the exposure as time goes on and even capture HDR images.
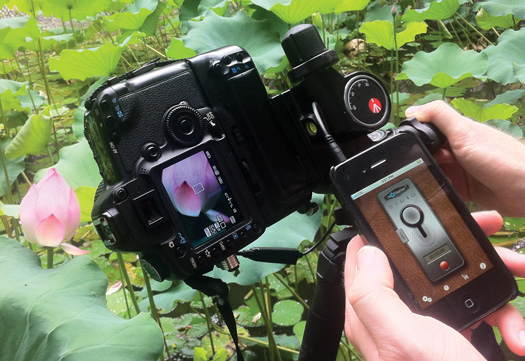
One example of a third-party intervalometer is the ioShutter that uses a smartphone app as its interface.
A basic intervalometer can be purchased for less than $30; a good one, such as the Timelapse+, which can also adjust exposure and ISO, costs $199. If you own a camera with a built-in intervalometer, you can start learning the ins and outs of time-lapse photography without any additional equipment.
Get a Smooth-Ride Slider
Straightforward time-lapse videos are shot from a static position without moving the camera. However, if you’ve checked out some of the incredible time-lapse videos online, you’ll see that the best ones have the camera move while the images are being captured.
In order to achieve this almost-3D effect, you’ll need a slider, which lets you move the camera smoothly along the rails. This can be done manually by moving the camera a short distance between each exposure. If you want to leave the camera unattended, however, the slider will obviously need to be motorized.
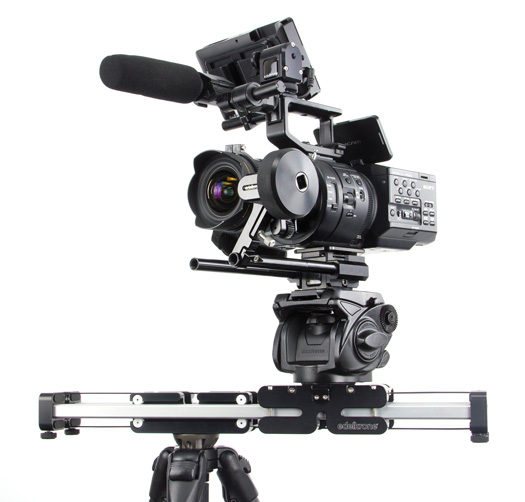
edelkrone makes the heavy-duty SliderPLUS PRO, which ingeniously halves the length of the rails for easier transportation.
I tried out a Varavon slider with the optional Motorroid kit, which can move the camera at a predetermined speed from 10 seconds to a few minutes. You’ll probably want the time to be longer than this, in which case the optional Timeroid kit is more appropriate as it can be set to move the camera a short, pre-set distance between each shot.
Sliders can be mounted on a flat surface or on a tripod. If they are motorized, it’s also possible to mount the camera vertically or at an angle to get a different perspective. The belt drive will then move the camera up or down as needed.
A simple, lightweight slider for a compact camera can start as low as $100, while a motorized slider such as the Varavon with the Motorroid kit starts at around $700, depending on length.
Putting it Together
Once you’ve got all the images, you can create the clip using any number of programs including Lightroom, iMovie, Final Cut Pro or even some free open-source programs. The clips can then be added to a slide show or included in an Animoto presentation just like a regular video clip. If you own a Mac, you can even use the built-in camera to create a simple time-lapse using a free program called Gawker.

iMovie is just one of the numerous programs that can be used to create a time-lapse video from a series of still images.
While anyone can create a time-lapse video, it takes a critical eye and the ability to imagine what will happen over time to put together an eye-catching clip. Of course, once it’s assembled, you’ll want to add some titles and music just as you would with any regular video clip. Practice and experiment—it’s time worth spending if you feel the addition can help set you apart as a hireable wedding photographer.
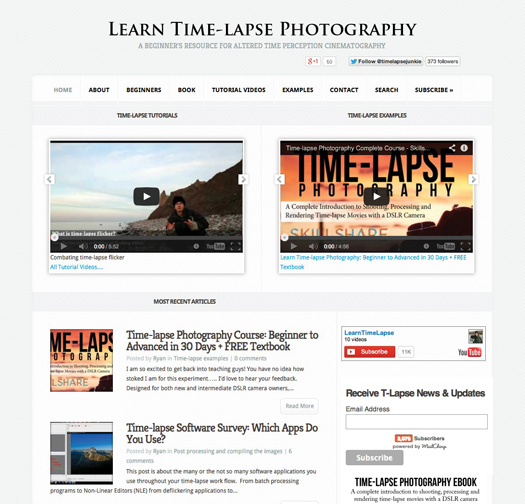
There are numerous blogs and websites with hints and tips on time-lapse photography. One of the most comprehensive is learntimelapse.com.
Passing Time
Time-lapse photography is especially effective with landscapes, as it hastens the passage of time showing clouds, lights going on and off, or even traffic moving and day turning rapidly to night. They can be inspirational clips. Time-lapse clips of a wedding can also be effective as you witness how some guests don’t move a lot while others might appear to be “on the go” all the time. Sometimes they end up being humorous and may even remind you of old Benny Hill slapstick comedy skits!
There are innumerable city and landscape time-lapses posted online. I’ve checked out many, including the “50 top timelapse videos of 2013,” but one that really caught my eye a few months ago and inspired me to think about doing something similar is City Lights by Colin Rich.
Related Links:
Vincent Laforet’s Filmmaking Trade Secrets
Q&A: Movie-Making Techniques from Hollywood Hot Shots
Rethinking Time-Lapse with Dazzling Compilations of Day and Night
Related Articles

Why Felix Kunze Thinks We’ve Been Overcomplicating Lighting (And What He’s Doing About It)
July 24, 2025
When it comes to lighting in photography, most of us instinctively reach for soft, flattering light. We diffuse our flashes, shoot through umbrellas, and seek out cloudy days. But what if I told you that some of the most striking portraitYou know the moment: your subject is ready, you’ve got about five feet of space to work with, and the...
More »

How to Photograph Fireworks for Couples Portraits
October 24, 2024
Fireworks aren’t just for the Fourth of July! You’ll find them regularly at theme parks, sporting events, and maybe more surprisingly, at weddings. For the latter, fireworks offer photographers a wonderful opportunity to capture epic couples portraits with a truly unique backdrop. Of course, if you’re not familiar with how to photograph fireworks, there are some basic tips you’ll want...
More »

Why Top Photographers are Embracing Hard Light (And You Should, Too)
October 23, 2024
When it comes to lighting in photography, most of us instinctively reach for soft, flattering light. We diffuse our flashes, shoot through umbrellas, and seek out cloudy days. But what if I told you that some of the most striking portraits actually come from embracing hard light? That’s exactly what renowned photographer Roberto Valenzuela teaches in his groundbreaking new Dynamic...
More »
