
5 Transitional Newborn Setups
September 26, 2014
After photographing newborns for almost 15 years, I have learned to streamline my sessions to an efficient workflow—my goal is to achieve a sellable shot within the first 15 minutes.
One way to do this is to photograph your tiny subjects in a transitional posing method, meaning making minor adjustments during the session (of clothing, set and position) to create various looks and unique images while barely moving the baby.

Photos © Ana Brandt
1. Baby Bundled
My session starts by wrapping a fed and burped baby in a blanket, and putting her in a nice cozy environment right away. Once I do this—and the baby falls into an easy slumber—the thought of moving her to an entirely new set is not a good idea.
I will usually place the baby in a basket just big enough to fit her, so she is snug and content. In this example above, the baby has been placed on a soft beanbag. If I am on location, I will use natural light and a reflector; otherwise in-studio I use large softboxes. In this image, I am using Paul C. Buff’s PLM system.
I have turned the sound down on my camera so the clicking sounds are not audible, and we use a free white noise app on my phone, placed near the baby. I am shooting over the baby, and making sure my camera’s wrist strap is on for safety.

2. Remove Outer Layer
Because the baby was wearing a diaper cover under the sack, I was able to carefully remove the outer bundle and still get a good shot. Next, I gently lifted her up so we could place a flokati fur underneath her for a new look. The whole change took less than a minute.
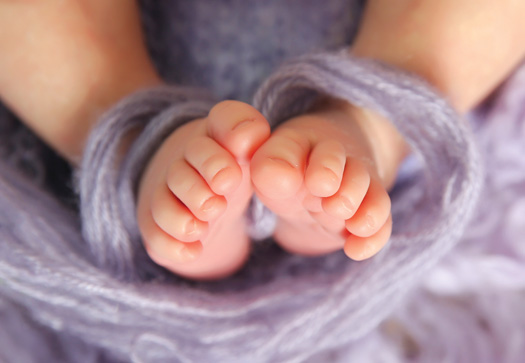
3. Details
Newborns change so quickly in size, and knowing their hands and feet will never be this little again makes details super important to capture; my clients often use them in announcements and books. They’re also super easy—I didn’t switch lenses; I used the same 24-70mm USM II L Canon lens I had been using. This image was captured using studio light and my settings were 1/160 at f/5.
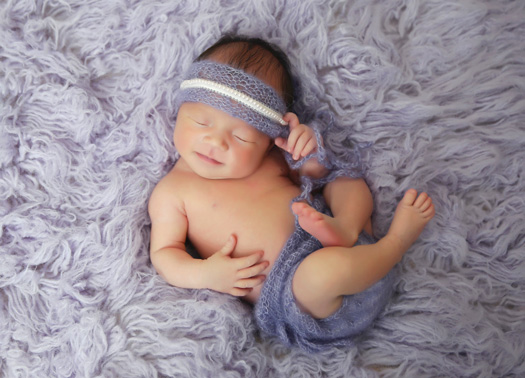
4. Switch Props
The baby’s bonnet was switched in this image to a headpiece with pearls. For props, I ask Mom to pick out hats, headbands and coordinating items in the same colors so I can then transition quickly during the first set. I keep extra blankets and layering pieces handy in the same color palette.
When switching props, I will often shush in a baby’s ear and have an assistant or Mom keep her warm hands on the baby, generating heat (babies love physical contact). Once the switch has happened, we pull our hands away very slowly—too quickly will startle the baby with the difference in air temperature.

5. Naked Baby
I usually end sets with the naked pose (in case of a baby accident). Years ago, I would start with the baby naked and spend the first hour just cleaning up!
Removing the clothes takes some care and often a pacifier. While Mom or an assistant is very close with hands covering the baby, I gently remove the cover. Usually the baby is in a deep sleep by then and we can do this with ease. If the baby is not sleeping, we will have her suck on the pacifier, and once the diaper is removed, cover her with a blanket and lull her back to sleep.
Each set takes up to 30 minutes and once I have that first shot, the transitioning is done very slowly so as not to disrupt the baby’s sleep. Changing the headband may take a few minutes, but it only takes seconds to capture the image. I would rather put the bulk of my time into the care and safety of the baby, allowing for quick exposures when ready.
Find Ana Brandt at bellybabylove.com, on Twitter, Instagram and Facebook.
Related Links:
“One Day Young” Captures Gentle Moments Between Moms and Their Newborns
Newborn Portrait Tips from Kelly Brown
Texas Newborn Photographer Frances Otero Focuses on Local Market
Related Articles

Why Felix Kunze Thinks We’ve Been Overcomplicating Lighting (And What He’s Doing About It)
July 24, 2025
When it comes to lighting in photography, most of us instinctively reach for soft, flattering light. We diffuse our flashes, shoot through umbrellas, and seek out cloudy days. But what if I told you that some of the most striking portraitYou know the moment: your subject is ready, you’ve got about five feet of space to work with, and the...
More »

How to Photograph Fireworks for Couples Portraits
October 24, 2024
Fireworks aren’t just for the Fourth of July! You’ll find them regularly at theme parks, sporting events, and maybe more surprisingly, at weddings. For the latter, fireworks offer photographers a wonderful opportunity to capture epic couples portraits with a truly unique backdrop. Of course, if you’re not familiar with how to photograph fireworks, there are some basic tips you’ll want...
More »

Why Top Photographers are Embracing Hard Light (And You Should, Too)
October 23, 2024
When it comes to lighting in photography, most of us instinctively reach for soft, flattering light. We diffuse our flashes, shoot through umbrellas, and seek out cloudy days. But what if I told you that some of the most striking portraits actually come from embracing hard light? That’s exactly what renowned photographer Roberto Valenzuela teaches in his groundbreaking new Dynamic...
More »
