
First Exposure: Corel Painter 12
December 1, 2011
It’s been 20 years since the introduction of Painter, packaged in a distinctive one-gallon paint can. This anniversary may be one of the reasons Corel decided to introduce massive changes to the user interface as well as to introduce a wealth of new features in Corel Painter 12. Whatever the reasons, the changes made in Painter 12 make the software even more accessible and usable to photographers.
As with Adobe Photoshop, photographers are not the only target audience for Corel Painter. Fine artists, designers, illustrators and concept artists in the advertising, entertainment and video gaming industries also use the program. This review will touch on new and updated features relevant to photographers.
The most important new feature in Painter 12 is the redesigned interface. Corel seems to finally accept that most of Painter users are also Photoshop users. The default interface of Painter 12 is completely redesigned to closely match that of Photoshop and it is always available as a preset in the Workspace menu. Icons are enlarged and panels dock in tabbed groups.
With Painter 12, you can rearrange panels and palettes to suit your workflow. You can group two panels into a palette, or add a panel to a palette, by dragging one onto the other, just as in Photoshop. You can snap panels and palettes to the edges of the interface, allow them to float freely, or move them off to a second monitor to enlarge your canvas space.
While the new interface is a huge advantage for users new to Painter and to those familiar with Photoshop, users of previous Painter versions will likely experience mild to wild frustration with the rearranged interface. As configurable as the Painter interface is, I found no way to configure it to look like Painter 11. However, I did configure the preset Photoshop window to include the panels and palettes that I routinely use and saved it as my default interface.
A new Navigator window mimics the one in Photoshop and resides in the upper right of the screen. A nice feature of this new panel is the ability to rotate the image by rotating the red rectangle that shows the boundaries of the zoomed view. The Navigator window could use a setting to return the enlarged image to “fit to screen,” but otherwise it is a welcome addition.
In Painter, you can open Photoshop files that contain pixel-based layers and layer masks, with multiple channels intact. Layers and layer masks can be accessed and edited by using the Layers panel, much like in Photoshop. You can also create and paint on new layers in Painter 12, then save the layered document in Photoshop file format. Layer masks and blending modes are also available in Painter.
Being a photographer, I use Painter to create new images from my photographs using one of the many cloning techniques that are available. So I welcome the new Clone source panel that I have docked into the Layers and Channels palette. This eliminates the need to go back and for the to the File menu, which was the only place you could change the clone source before Painter 12. With the new panel you create a library of the source images for your new image and you can quickly clone sections of them into your new image. These clone images remain embedded in your document if you save the file in Painter’s native format. The Clone source panel is a big workflow improvement if you use Painter as I do.
The Auto-Painting Panels, where I spend nearly all of my time in Painter, are relatively unchanged and are now separate panels rather than grouped into a palette. The panels look a little different with some new icons, but they function the same. Using these I can, with little effort on my part, set up the options and allow Painter to use one of its Smart Strokes brushes to automatically create a painterly image for me and automatically stop when it feels the new image is complete.
But if you’re more hands-on and want more control, you can turn off Smart Strokes and paint manually, or more accurately, semi-automatically. The advantage of this method is that you are no longer limited to the Smart Stroke brushes. Now you can use any brush that Painter allows you to use for cloning. Painter still automatically applies the brush strokes, but you now control the brush randomness, pressure, rotation, length and size. And using this technique, the process runs until you choose to stop it.
The changes in Painter 12 go a long way in simplifying the interface for new users. Corel offers a wealth of tutorials on its Web site, www.corel.com, as well as extensive offline and online help. Even experienced users will find themselves consulting these resources because of the extensive changes.
This and a few other “previous user” frustrations aside, Painter 12 offers far more tools than Photoshop for natural media painting, both from a blank canvas and from existing photographs. By mastering just a small subset of its toolchest, you can easily create images that will set your work apart from your competition.
COREL PAINTER 12
MSRP $429 (full version); $229 (Upgrade); $449 (limited edition in paint can package.
Minimum System Requirements:
Windows® version:
Microsoft® Windows® 7 or Windows Vista® (32-bit or 64-bit editions), or Windows® XP (32-bit edition), with the latest Service Packs installed
1 GHz processor or greater
1 GB of RAM
600 MB of hard disk space for application files1
Mouse or tablet
1200 x 800 screen resolution
DVD drive
Microsoft® Internet Explorer® 7 or higher
Mac OS® version:
Mac OS® X 10.5 or 10.6 (with latest revision)
Intel® Core™ Duo
1 GB of RAM
300 MB of hard disk space for application files
Mouse or tablet
1280 x 800 screen resolution
DVD drive
Stan Sholik is a commercial/advertising photographer in Santa Ana, CA, specializing in still life and macro photography. His fifth book, Nik HDR Efex Pro, for Wiley Publishing, is now available.
Related Articles
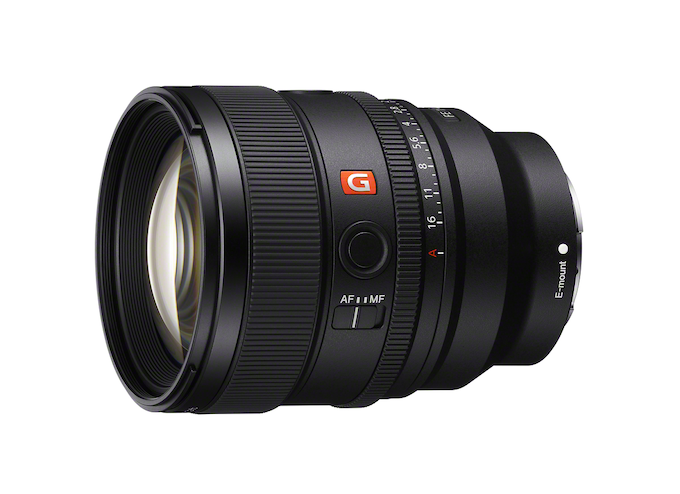
Sony’s Nex-Gen FE 85mm f/1.4 G Master II Prime Lens
September 24, 2024
For many photographers, a fast, 85mm prime lens is a dream lens. It’s perfect for a variety of portrait styles and can produce the dreamy bokeh that is the hallmark of large aperture glass. The latest 85mm prime on the market is the second generation Sony 85mm f/1.4 G-Master II. The original was introduced eight years ago, to meet (or...
More »
Canon Announces New RF28-70mm f/2.8 Zoom Lens
September 19, 2024
Canon released a new standard zoom with its RF28-70mm f/2.8 IS STM lens. This lens provides a versatile focal range similar to the RF24-70mm f/2.8 L USM lens but at less than half the price: $1,099 vs. $2,499. Granted the L designation of the older lens is, at least partly, responsible for the price difference but the new 28-70mm will...
More »

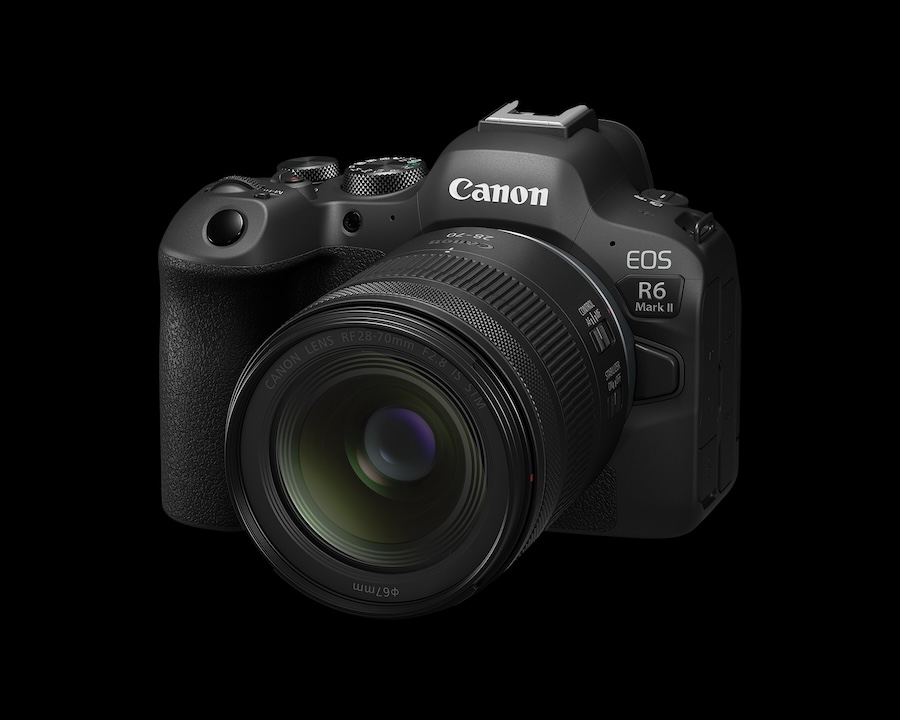
Canon Launches Two Pro-Level Cameras
July 18, 2024
Canon has officially launched two new, pro-level R-series mirrorless cameras: the 24-megapixel EOS R1 with its high speed performance and the 45-megapixel, high resolution EOS R5 Mark II. Not surprisingly, the R1 with its 40fps burst shooting will appeal to sports photographers and photojournalists—hence its built-in Wi-Fi and Ethernet. Of course, we expect to see this camera in action at...
More »
