
Cliff Notes: 6 Lighting Tricks We Learned From Cliff Mautner
April 7, 2016
In his ongoing series Lighting & Skillset Bootcamp: Workshops for Wedding and Portrait Photographers, wedding photographer, Nikon Ambassador and lighting guru Cliff Mautner draws on more than three decades of experience as a photojournalist for nearly half his career, and shooting around 50 weddings a year the next half. “I’m Bill Murray in Groundhog Day,” Mautner quips. “I know it might be my 1,000th wedding, but for the bride, it’s her first. I still take this work very personally. But I used to have an attitude—a wrong attitude, I might add—that these are my images. They are not. It’s my artistic interpretation of their day, however, they are the clients’ images.”
Mautner contends that the wedding photographer’s job is to put his or her customers in the best light—literally. To that end, he is focused on not only lighting but also developing crucial skills behind the camera and in the business realm. He started his workshop series in 2007 in response to what he perceived as “homogenization” in the wedding photography industry—a certain stylistic mimicry resulting from a lack of basic-skill mastery. With this in mind, Mautner emphasizes a few key lighting skills photographers should learn to develop a style of their own.
1. SHOOT DELIBERATELY
“The most important thing is the final image—in camera!” Mautner says. “There is no un-suck filter in Photoshop. Think about your framing and your exposure in camera.”
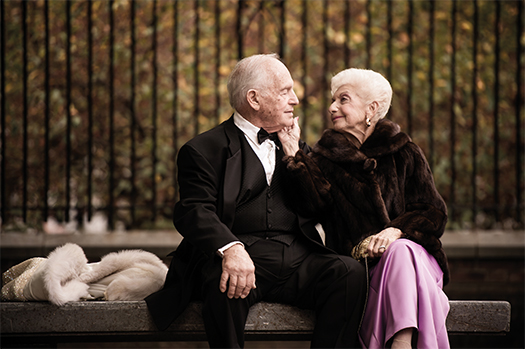
Regarding the latter, Mautner cites a real world example of a scene of a very dark-skinned Nigerian man with a very light-skinned Iranian woman. “How do you expose for this?” he asks. “If they are in the same frame together, you can’t have two exposures. And you don’t want to ‘open up’ for the dark-skinned person or ‘close down’ for the light-skinned person. Both individuals can be properly exposed with the same exposure value. The highlights on the dark complexion and the shadows on the light complexion are what give the subject dimension—and there are supposed to be shadows and highlights on faces. Pick an exposure, take a look and see what works. Too many people struggle with exposure and then they forget about creating the image.”
2. MANIPULATE EXPOSURE
The next step is exposing for a chosen effect—sometimes outwitting the camera’s settings. “If your subject is brighter than the overall scene, the subject itself is a highlight and shouldn’t be blown out when using Aperture priority,” Mautner says. “So if the overall scene is darker than the subject, you’ll want to compensate under: If you’re in matrix metering mode, our cameras will want to attempt to make everything 18 percent gray and the subject will generally be overexposed. By using exposure compensation, you’ll tell the camera, ‘It’s not as dark here as you think it is.’ And your camera speeds up the shutter so the highlight is exposed properly. The inverse would be true if the overall scene was brighter than the subject and you’ll want to compensate over, thereby slowing the shutter to expose properly for the face instead of the background. As good as the meters are today, they can still get fooled, but we don’t have to.”
Mautner says such adjustments often need to be made on the fly. “When using the manual [exposure] mode, if the overall exposure for a scene is consistent, then this mode would work flawlessly,” he says. “But you can learn how to predict the compensation so that Aperture priority becomes a rather instinctive tool when the lighting scenario is rapidly changing.”
3. MASTER THE TECHNICAL
“If it’s not innate, you can’t create,” Mautner says. “How can you create imagery when all you are thinking about is exposure and focusing? You’re not thinking about light or composition or mood. You’re not seeing three-dimensionally, or about the foreground-subject-background relationship; you’re just hoping to get a technically accurate image, in focus—and that’s not creativity. The creative process begins when the technical part is instinctive.”
A case in point is your chosen camera mode. “There are vast differences in the various exposure modes. Using Aperture priority all the time would be great—if the world was 18 percent gray,” Mautner notes, referring to the typical default setting of your camera’s light meter. “But you need to decide what to expose for. When using this mode, it’s important to predict the amount of exposure compensation needed before pressing the shutter.”
4. JUXTAPOSE HIGHLIGHTS AND SHADOWS
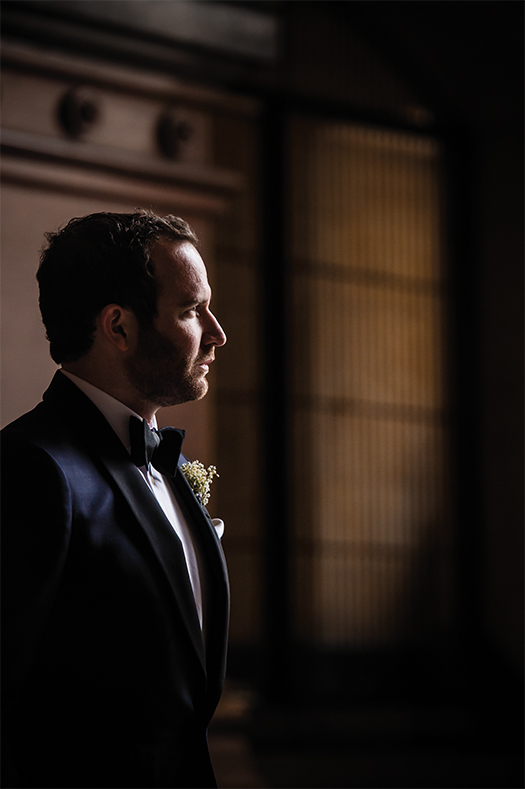
“These are my three watchwords: texture, dimension and mood,” Mautner says. “The goal is to create images with impact, and usually the images we love have these attributes. In order to get them you need to juxtapose highlights against shadows, using the edge of the light to create a sense of dimension.”
One key decision is whether to emphasize light or dark areas. “Shadow is my canvas and light is my paint,” Mautner explains. “The highlights in certain situations are more important than the shadows; sometimes the shadows are more important. It’s a matter of deciding what you’re trying to communicate with the image and exposing accordingly.”
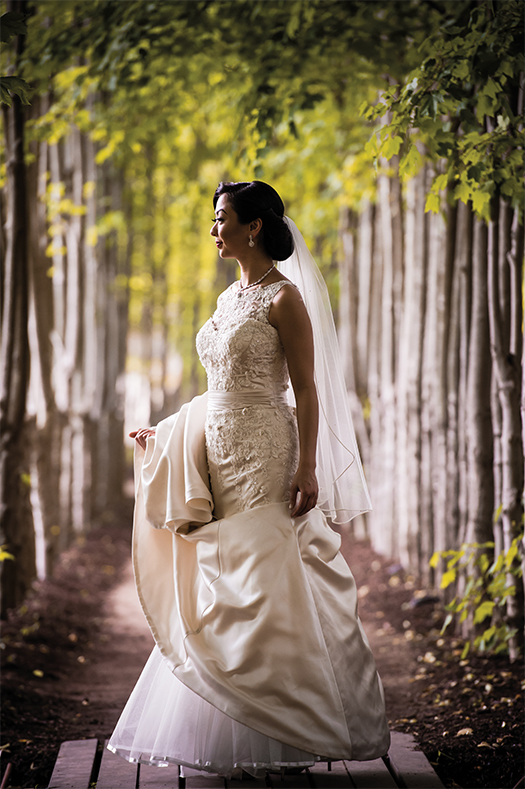
When you learn to interpret light, he adds, you can even use bad light to your advantage. “Difficult lighting conditions, such as midday sun, can create opportunities for interesting, dramatic images when harnessing that harsh light,” Mautner says. “By looking for backgrounds that are fairly dark—such as a group of trees—you can place your subjects between yourself and the sun and expose for the faces. The gorgeous backlight creates a halo of brilliance around the subject if the background is darker than the highlights. Once you understand this shadow-highlight relationship, the safe, flat light is no longer preferable to me because there is no texture, dimension or mood to the image.”
5. UTILIZE FLASH WHEN NEEDED
Mautner regards off-camera speed lights as tools to be used when the scene lacks quality light. “When you’re using a speed light, you want your shutter speed to control the ambient light,” he says. “For example, if you turn off all the lights and use a flash, you can take a picture at an extremely slow shutter speed and still produce a sharp image. When the exposure settings are set two or three stops below the ambient reading, you’re generally going to freeze your action. That flash duration controls whether or not that image is going to be frozen—and then the exposure value that you are using will be fine.
“But as we bring the lights up in the room, at that same slow shutter speed, we may see that the people are moving, so you’ll need to speed your shutter up because the flash is no longer able to freeze the action. You need to take in account the relationship between flash, ambient light and shutter speed.”
6. ACCENT THE MOOD
“The mood of an image is enhanced with with gesture,” Mautner notes, “but the light itself—its quality, temperature and direction—are what dominate the mood. If you have a very dramatically lit image where you’re just using the edge of the light and that’s juxtaposed against a dark, shadowed area, then there’s a mood to that. Lighting only part of a frame is much more interesting than lighting all of it.”
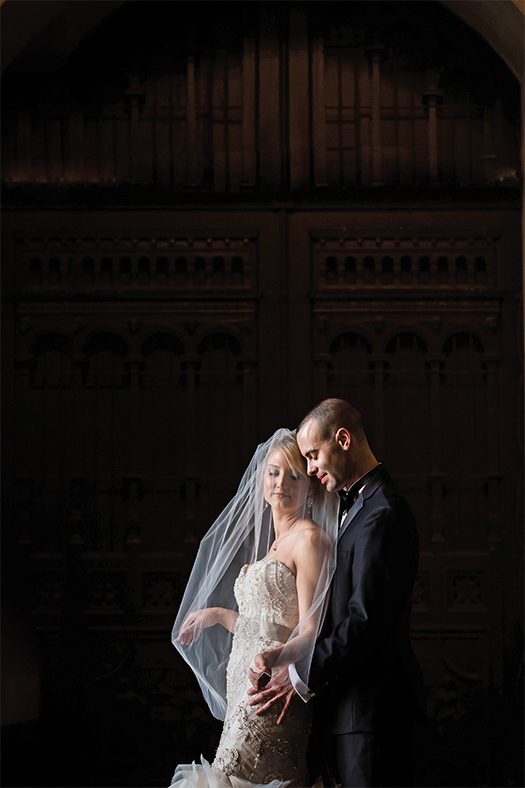
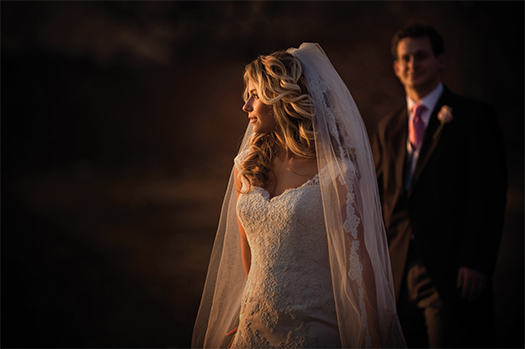
Whether you’re using available light or a speed light, the light must be controlled. It’s the reason he doesn’t use bounced flash very often; it just raises the ambient light level in a room, rather than “painting” with it. Such an effect can artfully draw the viewer in and spotlight the subject. When creating mood, the direction and dispersion of the light is essential. Mautner likes modifiers that give him control so the light isn’t spilling everywhere. (At left, a good example of how he painted with light; Nikon D4S at f/3.5, 1/250th of a sec. and ISO 1250.)
Cliff Mautner’s “Lighting & Skillset Bootcamp: Workshops for Wedding Photographers” will take place May 17–19 in Haddonfield, New Jersey.
Related:
How Lindsay Adler Elevates Drama with Lighting
Related Articles

Why Felix Kunze Thinks We’ve Been Overcomplicating Lighting (And What He’s Doing About It)
July 24, 2025
When it comes to lighting in photography, most of us instinctively reach for soft, flattering light. We diffuse our flashes, shoot through umbrellas, and seek out cloudy days. But what if I told you that some of the most striking portraitYou know the moment: your subject is ready, you’ve got about five feet of space to work with, and the...
More »

How to Photograph Fireworks for Couples Portraits
October 24, 2024
Fireworks aren’t just for the Fourth of July! You’ll find them regularly at theme parks, sporting events, and maybe more surprisingly, at weddings. For the latter, fireworks offer photographers a wonderful opportunity to capture epic couples portraits with a truly unique backdrop. Of course, if you’re not familiar with how to photograph fireworks, there are some basic tips you’ll want...
More »

Why Top Photographers are Embracing Hard Light (And You Should, Too)
October 23, 2024
When it comes to lighting in photography, most of us instinctively reach for soft, flattering light. We diffuse our flashes, shoot through umbrellas, and seek out cloudy days. But what if I told you that some of the most striking portraits actually come from embracing hard light? That’s exactly what renowned photographer Roberto Valenzuela teaches in his groundbreaking new Dynamic...
More »
