
Demystifying Video: A Guide to the Often-Perplexing World of Filmmaking Processes
January 20, 2016
Spend a few minutes perusing the spec sheet of a video camera or DSLR/mirrorless, and you’ll quickly be flooded with confusing jargon about file formats and codecs. Here, we’ll make sense of some of the common terms you’ll encounter as you dig into your camera’s video features.
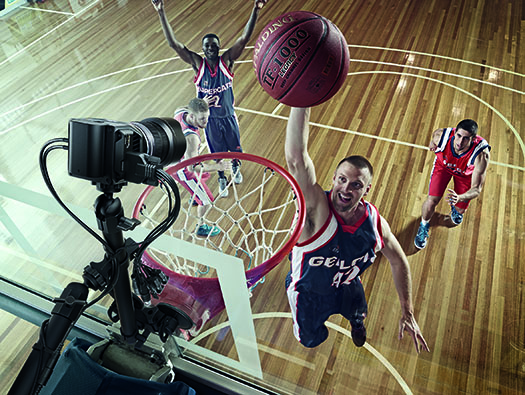
With cinema-quality cameras like Blackmagic Design’s Micro Studio Camera small enough to go anywhere, it’s easy to capture dramatic footage. Photo Courtesy of Blackmagic Design.
Terms + Definitions: A Crash Course in Today’s Video Lingo
RAW: A RAW file is the data produced by a camera’s imaging sensor before it has been processed by the camera’s image processor. Cameras from RED, Blackmagic, Arri, and some Canon DSLRs with Magic Lantern-modified firmware can output RAW video files. When light hits a camera’s sensor, that sensor turns the light into data which then goes through an image processor before it turns into visible footage, either video or still. Shooting in RAW allows you to bypass your camera’s image processor in favor of a more powerful or flexible image processor in the post- production stage. Filmmakers shoot in RAW for the same reasons still photographers do: for the added detail and dynamic range that can be pulled out of these files.
Uncompressed Video: Some cameras have the ability to take the data produced by their image sensor, run it through the image processor (so it’s not RAW) and then send it out to an external recorder via an HDMI or other connection (SDI) without any applied compression. This has the advantage of being higher quality footage with less noise, fewer compression artifacts, and better detail than using a compression format like H.264, which many cameras use when saving video to a memory card. And unlike RAW files, uncompressed video does not require additional processing to bring it into a watchable format. It does, however, require an external recorder and significant amounts of storage space. Some recent cameras from manufacturers such as Sony, Nikon, Canon, Olympus and Panasonic offer uncompressed video output via an HDMI connection.
Log: Log is an image profile that aims to use as much of the sensor’s capabilities as possible. Panasonic has V-Log, Sony has S-Log, and Canon has C-Log, but they all aim to do the same thing: give digital footage the tonality and latitude that motion picture film has. Log video files appear extremely low-contrast and desaturated, with many midtones and few true blacks or whites. This is designed to record more stops of dynamic range during capture, and then sort that data back out into watchable footage later in post-production. Log also requires that every piece of footage be exposed carefully during capture and then processed properly during post-production.
XAVC: An H.264-based video format designed by Sony to better support 4K and high-definition video formats such as 1080 50p/60p, XAVC can support 4K resolution (4096 ? 2160 and 3840 ? 2160) at up to 60 frames per second. It supports color depths of 8, 10, and 12-bits, too, so it produces a high-quality image despite its efficient compression.
HEVC/H.265: A successor to the common H.264 codec, H.265 High Efficiency Video Coding (HEVC) was developed with the intent of doubling the compression efficiency of H.264. The means that, for a given quality, HEVC can compress video to around half the file size that H.264 can. It is also designed to support 4K and 8K resolutions up to 8192 ? 4320. To date, only two cameras from Samsung record using HEVC, but we suspect more are on the way.
IPB: A type of compression used within the H.264 codec and commonly seen in digital cameras, IPB takes a frame of video, called an interframe or “keyframe,” and uses the information in it to fill in details in subsequent frames, which are discarded to save space. Keyframes can be established every 15 frames in a 30fps video, for instance, and while it allows for longer video recording, anyone who needs to carefully edit individual frames of a video won’t have as much data to work with.
ALL-I: This is used within the H.264 codec and is commonly seen in digital cameras. Unlike IPB, ALL-I captures every frame as if it was an interframe. No frames are generated based on prediction and no data is discarded. As you might expect, this increase in quality comes at the cost of significantly larger file sizes—ALL-I files are generally 3x the size of a comparable IPB file. ALL-I is useful for any situation where the highest quality footage and exact frame-by-frame editing is more important than small file sizes.
—Josh Root
Playing Nice: Ensure Footage From Different Cameras Blend Seamlessly
Mismatched Cameras
Every camera brand has its own distinct look and uses its own type of color science. This is why your Canon footage will look very different from your Sony footage, even when both cameras are set to the exact same white balance and exposure.
When faced with the issue of working with mismatched cameras, the first step is to ensure you are capturing as close of an image in-camera as possible. While Canon and Sony may have very different looks right out of the box, some fine-tuning in the menus will help get you much closer right off the bat. For instance, if one camera has more contrast than the other, choose a different picture profile or dial in your contrast settings on both cameras until they land in the same ballpark.


To keep footage from multiple cameras consistent, you need to do some color grading. Start at the midtones and then add warmth (orange) or cool tones (blue) to find a relatively neutral look for your film. Figure 1 shows the original capture plus the color wheel settings. Figure 2 demonstrates how slight adjustments in gamma can yield a pleasing tone. Photos © Noam Kroll.
No matter what, you will never get a perfect color match in camera. The goal should be to get the images as close as possible in camera, so you can later use color-grading tools to match the images more effectively in post (Fig.1). A simple three-way color corrector is often all that your footage will need to get the shadows, midtones and highlights balanced properly. With a little bit of finessing, both cameras should be able to match and intercut with each other seamlessly. I recommend starting off by adjusting your midtones as a means to correct any potential white balance issues. Either add warmth (orange) or cool tones (blue) with your color wheels until you find a relatively neutral look for each of your shots (Fig.2). From there, adjust the shadows and highlights in the same manner to ensure they are as natural and organic looking as possible.
Drone Footage
More and more wedding and event videographers are using drones for their work as a means to increase production value. Aerial footage will undoubtedly add a lot of sizzle to your visuals, but you need to be careful about how and when you use it, since the wide angle look of most drone cameras will not always match the look from your A camera.
One of the easiest solutions to this problem is to simply avoid shooting unnecessarily wide. Most drone cameras and GoPros will give you the ability to shoot in a crop mode (emulating the look of a longer lens), which effectively gets rid of the fisheye distortion that can be distracting when intercutting with more standard DSLR footage. Alternatively, if you need to shoot ultra wide for any reason, there are many post-production tools that can be used in your NLE to warp the image to reduce the fisheye effect. Shooting in 4K resolution can help here too, since the extra resolution will allow you to reframe your scene and eliminate wide angle distortions toward the edge of your frame.
Camera Movement
Using a Ronin and other gimbal-based stabilizers are also becoming common practice on wedding shoots, but they pose some challenges of their own. Specifically, it can be hard to find the right cutting points when switching between moving footage and static tripod shots, since they each offer a very different aesthetic.
This certainly doesn’t mean that you can’t shoot with a gimbal and a tripod and find ways of working the footage together—you just need to be more careful with it. For instance, on location you might want to consider creating more camera moves on your tripod (such as pans or tilts), which can serve as fluid cutting points for the gimbal footage. And, when operating the gimbal, you should always be looking for opportunities to “land the shot” (i.e. stop moving) so that the camera isn’t constantly in motion. Simply practicing these techniques will give you many more options in the editing room, and will ultimately help you to maximize the usage of your footage.
—Noam Kroll
Audio Production Perfection: Don’t Let Poor Audio Deep Six Your Beautiful Visuals
Start With The Mix
Many editors make the mistake of mixing their sound after they have already made other adjustments to their audio clips (such as adding filters, or sweetening). The order of operations for audio is one of the most important variables to take into consideration when working, as it can have a direct effect on your final result. Always start by mixing your levels so that all of your dialogue tracks play at the same volume. Doing this first will give you a strong baseline to work from as you move ahead, and will help you avoid backtracking to fix problem areas later on in the process.
Use Crossfades
One very common issue in wedding films is a lack of crossfades on audio tracks. While you might be used to using crossfades only for stylistic effect, they should be used to ease in and out of every single audio clip on your timeline to ensure there are no clicks or pops as new tracks begin to play. Using crossfades in between clips is also good practice as it will help to blend together different textures and background ambiences throughout.
Clean Up Your Audio
Background noise is one of the most common audio issues you will encounter, and it has the potential to completely ruin an otherwise great sounding clip.
Let’s assume you’ve recorded an interview and the dialogue track is relatively clear, but there is a droning texture in the background from a fan, air conditioner or fridge. You will likely want to take one of these two approaches to solve the issue:
1. EQ
In many cases background audio issues can be tackled with a simple EQ adjustment. Using a built-in equalizer effect in your editing program, pull down either the high end (treble) or low end (bass) to cut out the background noise. Adjusting your high end will help with hissing sounds from air conditioners or vents, while adjusting the low end will help with rumbles from industrial machines.

You can use noise prints in your audio-mixing software to subtract the background sound from your source audio footage. Figure 3 provides a visual demonstration in Adobe Audition.
2. Noise Print
There are times when a simple EQ just won’t do the trick. This is usually the case when the background sound you are trying to eliminate is close in pitch to the sound of your subject’s voice. In these situations, you will want to use a noise print to solve the problem.
A noise print is a recording of the background sound (or ambience) that you want to get rid of. You can use this noise print in your NLE or audio-mixing software to subtract the background sound from your source audio footage. Remember though, in order to do this properly you must record room tone (a track consisting entirely of background noise) while you are on location. If you’re in an environment where there’s lots of competing background noise, making that secondary recording could help save your audio files in post. Depending on which software you are using, there are several ways you can use your noise print to eliminate the background noise.
For instance if you are using Adobe Creative Cloud, simply start off by right clicking your audio track in the timeline and selecting “Edit Clip In Adobe Audition” (Fig. 3). This will bring your audio over to Audition, provided it is installed on your system. Once in Audition, make a selection of your waveform that includes only background noise and no dialogue. Next, you will right click on the selection, and then click “Capture Noise Print.” Finally, you will remove the selection on your waveforms, and select “Noise Reduction” from the effects menu. This will allow you to apply your noise print to the rest of the track and fine-tune your settings until the background noise is reduced sufficiently.
Sweeten
Once all of the heavy lifting is done in terms of mixing and cleaning up your audio tracks, you can finally get to the audio sweetening stage. Tools like Final Cut Pro’s “Voiceover Enhancement” can be used very effectively to bring out clarity in your recordings. That said, it’s crucial that you don’t go overboard with plug-ins or filters, as using too many in conjunction can actually be detrimental to your sound. A touch of reverb here and there or some light compression is often all you need to add that final layer of polish.
—NK
Related Articles

Why Felix Kunze Thinks We’ve Been Overcomplicating Lighting (And What He’s Doing About It)
July 24, 2025
When it comes to lighting in photography, most of us instinctively reach for soft, flattering light. We diffuse our flashes, shoot through umbrellas, and seek out cloudy days. But what if I told you that some of the most striking portraitYou know the moment: your subject is ready, you’ve got about five feet of space to work with, and the...
More »

How to Photograph Fireworks for Couples Portraits
October 24, 2024
Fireworks aren’t just for the Fourth of July! You’ll find them regularly at theme parks, sporting events, and maybe more surprisingly, at weddings. For the latter, fireworks offer photographers a wonderful opportunity to capture epic couples portraits with a truly unique backdrop. Of course, if you’re not familiar with how to photograph fireworks, there are some basic tips you’ll want...
More »

Why Top Photographers are Embracing Hard Light (And You Should, Too)
October 23, 2024
When it comes to lighting in photography, most of us instinctively reach for soft, flattering light. We diffuse our flashes, shoot through umbrellas, and seek out cloudy days. But what if I told you that some of the most striking portraits actually come from embracing hard light? That’s exactly what renowned photographer Roberto Valenzuela teaches in his groundbreaking new Dynamic...
More »
