
Tips + Techniques
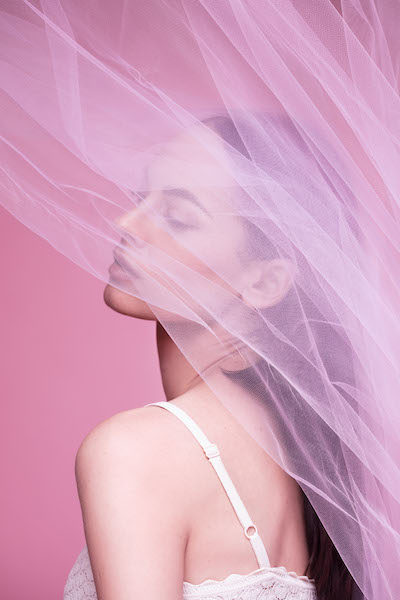
Self-Portrait Photography Inspo: Face Framing with Fabric
June 16, 2021
Looking for self-portrait photography inspo and creative ideas? All the photo knowledge that I’ve acquired so far has been from hours and hours of practice, no matter where I was—be it my small apartment, room, attic or kitchen. I focus more on what I have and not on what I don’t have, because my main goal has always been to learn. Which is one reason I embarked on this personal portrait series that uses fabric and focuses on soft beauty lighting.
[Read: Photography Imitation vs. Inspiration and How to Find Your Voice]
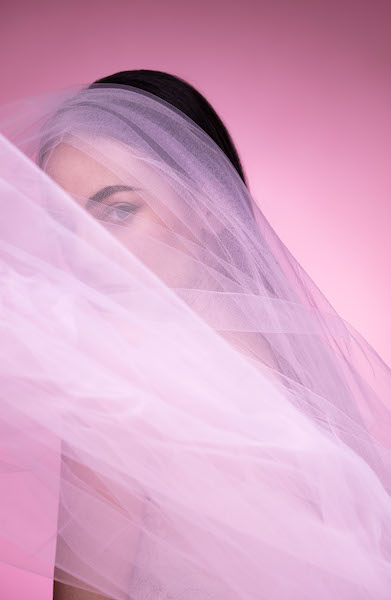
I had some amazing inspiration to draw off of from photographer Justin Cooper. His simple yet elegant beauty lighting motivated me to try out some of my own techniques with beauty lighting and using fabric (in my case, tulle, 3.28 yards long just to fit the background of image with its color), with myself as the subject, to learn new photo techniques and help me grow as an artist.

Self-Portrait Photography Inspo: Getting Started
I had three main goals I wanted to achieve for this portrait project:
1. Framing with fabric
2. Creating dimension with fabric (layering)
3. Understanding how to implement and gain speed putting together a specific lighting setup. The desired mood was a monochromatic look with soft beauty lighting.

Some photographers visualize their images, but I like to start with a few sketches. Thankfully, these ideas helped my end product. I think about the light and modifiers I’m going to use ahead of time and how they can help with colors, outfits and poses.

Lighting the Look
In this scenario, I used two lights—one main light from above and the other light illuminating the background and adding separation. The larger main light helped smooth out skin tones for the specific beauty aesthetic I wanted to achieve (see video below).
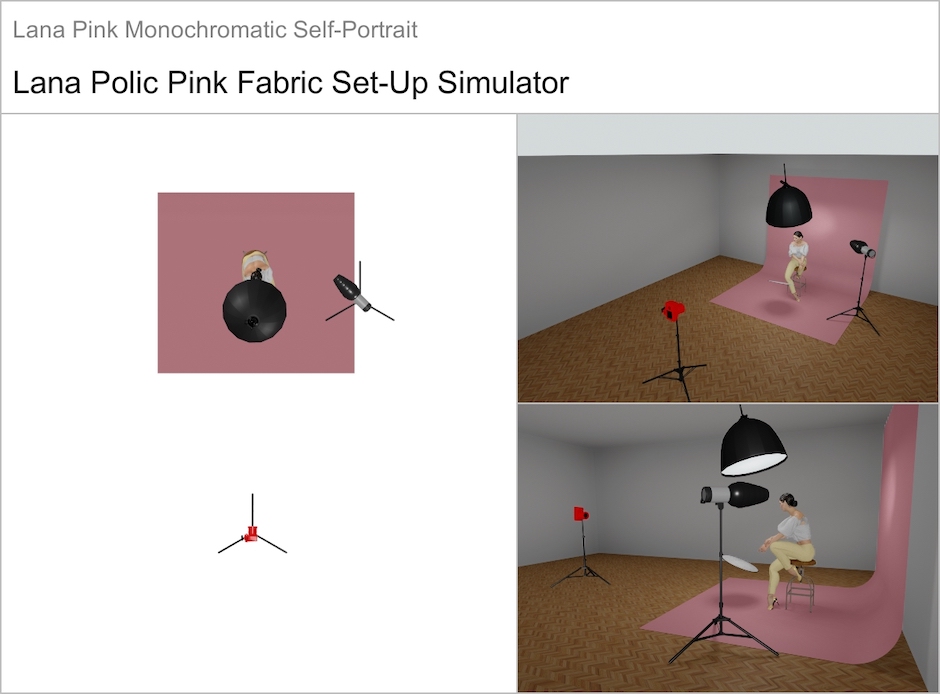

I like using a clean background so as to not detract or distract from the subject. I used a tulle fabric as a prop, but I advise that you try throwing your fabric first to be aware of its flow and to have a better idea of how you want to throw it.
[Read: Conceptual Portrait Photographer Richard Tuschman Reveals Magic Behind New Series]
To raise the shadows in the image and create the desired soft look, I put a silver reflector underneath and tilted it towards the subject. If you don’t have a reflector, any larger white surface such as a piece of cardboard or styrofoam will help you bounce the light and fill in the shadows.
Since lighting is needed on both the left and right side, I used white walls in my studio space to serve as reflective surfaces. If your space is larger or you do not have white walls, you can also use pieces of cardboard or make
V-flats to help you control the light around you.
Instead of seamless backdrop, you can buy a cardboard at your local paper store. The background color depends on your personal choice. My suggestion would be to find a color that serves as a great contrast to the color of hair or eyes.
You can take 3 x 4 cardboard cards and join them together to build a bigger background. Beauty images are often narrowly framed, so you don’t need a larger surface.
[Read: How to Turn Personal Projects into Paid Work]
The lighting vignette I created in this image was intended to provide dimension to the background highlight for the subject (in this case, me!). You can achieve something like that very easily with a snoot, but if you don’t have it, there is a solution for that, as well (below).
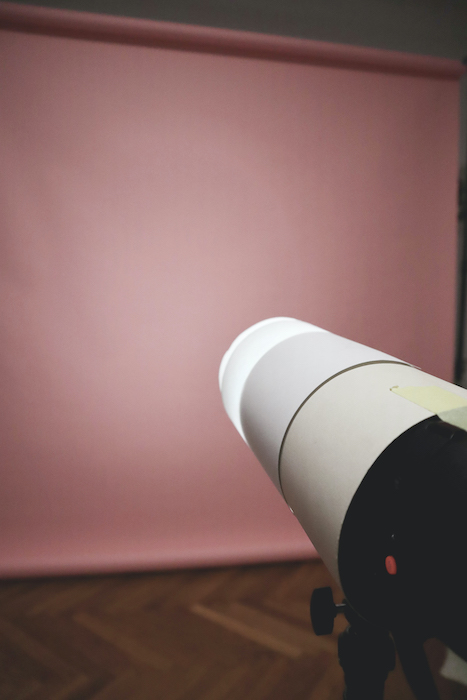
Buy a piece of white and black cardboard and make a roll with it that fits your studio light to place it on. You can add a white or black roll of cardboard to the extension. The difference between a black and white roll is how strongly the light focuses. The longer and darker the tube, the smaller the circle becomes with a sharper projection of the edges; with a white tube you will achieve a softer transition of light in the background.
I definitely suggest that you experiment with this technique until you achieve the desired effect for your own work.
How I Got the Shot
Camera and lens: Canon 5Ds and the Sigma EF 50mm f/1.4, Sigma EX 105 mm/2.8 DG OS HSM Macro
Lighting: Godox AD600 strobe, modifed softbox, positioned camera straight above; Godox AD400 modified with a DIY snoot at camera right lighting the background.
Settings: 1/125 of a sec., f/4.5, ISO 100
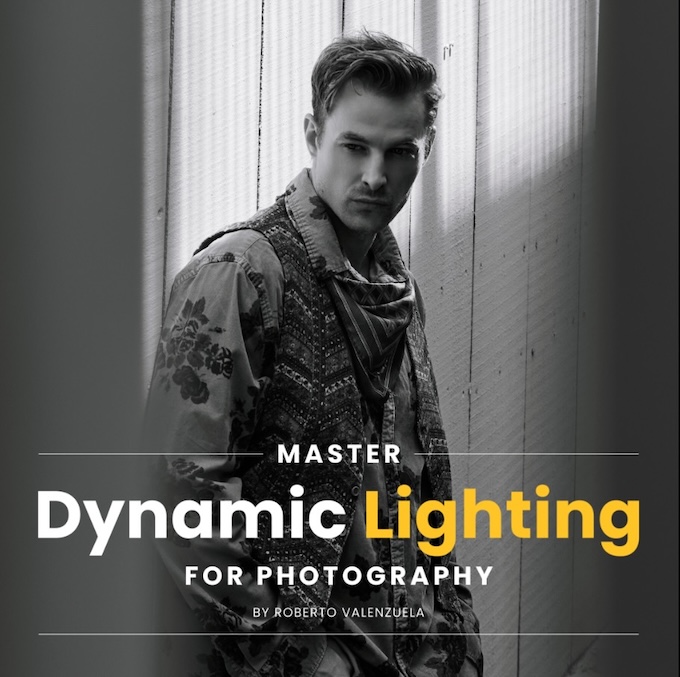
Lana Polic is a fashion and beauty photographer based in Croatia. She channels all of her passion for photography into taking self-portraits to use them as an educational tool for honing various photographic skills. She credits L.A.-based wedding and portrait photographer Roberto Valenzuela as her mentor.
As a thank you to our readers, we’re pleased to offer you a Rangefinder exclusive discount code to get 25% off The Portrait Masters course below. Use the code RF25 at checkout to redeem. This code cannot be used in combination with other sales.
Related Articles

Why Felix Kunze Thinks We’ve Been Overcomplicating Lighting (And What He’s Doing About It)
July 24, 2025
When it comes to lighting in photography, most of us instinctively reach for soft, flattering light. We diffuse our flashes, shoot through umbrellas, and seek out cloudy days. But what if I told you that some of the most striking portraitYou know the moment: your subject is ready, you’ve got about five feet of space to work with, and the...
More »

How to Photograph Fireworks for Couples Portraits
October 24, 2024
Fireworks aren’t just for the Fourth of July! You’ll find them regularly at theme parks, sporting events, and maybe more surprisingly, at weddings. For the latter, fireworks offer photographers a wonderful opportunity to capture epic couples portraits with a truly unique backdrop. Of course, if you’re not familiar with how to photograph fireworks, there are some basic tips you’ll want...
More »

Why Top Photographers are Embracing Hard Light (And You Should, Too)
October 23, 2024
When it comes to lighting in photography, most of us instinctively reach for soft, flattering light. We diffuse our flashes, shoot through umbrellas, and seek out cloudy days. But what if I told you that some of the most striking portraits actually come from embracing hard light? That’s exactly what renowned photographer Roberto Valenzuela teaches in his groundbreaking new Dynamic...
More »
