
Organize Your Archive: Hard Drives vs. Cloud Storage, and Foolproof File Naming
January 12, 2016
This article was adapted from posts on HowToArchive.com, Michael Grecco’s educational site for archiving, organizing, and storage. Grecco is also the creator of ProStorage, shock-resistant storage cases that can safely house up to 24 hard drives.
It may not be the most glamorous side of photography, but it is certainly one of the most important. Here’s what you need to know to stay organized and keep your work safe.
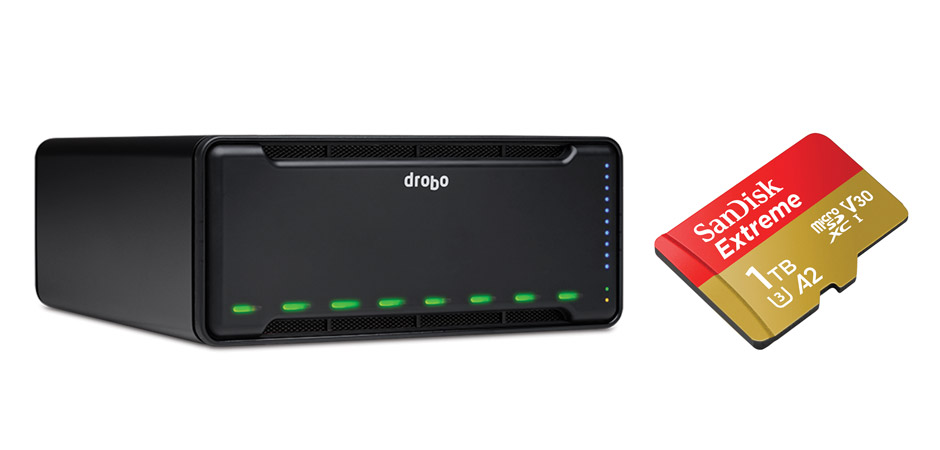
How Are You Storing? Hard Drives Vs. The Cloud
Now that both hard drives and cloud storage have fallen to affordable prices, the question is: which one is better suited for backing up your files? There are a number of pros and cons to consider first.
HARD DRIVES
pros
• The prices for hard drives are falling as storage sizes increase.
• As technology improves, transfer speeds get faster.
• There’s only a one-time cost.
• You are the only one with access.
• You can store two or more drives in different locations to help protect against theft, drive failure and natural disasters.
cons
• Drives can get lost or stolen—once that happens, your files are gone.
• Drives can fail, and without multiple copies you can lose files completely, or pay for expensive retrieval attempts via professional services.
CLOUD STORAGE
pros
• You can access data on any device, anywhere at anytime.
• There’s automated security.
• You can share files with others and on other devices.
• You only pay for what you use.
cons
• Downloading can be slow with large amounts of data, and it’s impracticable for large video files.
• The Cloud requires ongoing fees for storage and access.
• You must trust the provider with your data.
The Takeaway:
Cloud storage is great for small amounts of data needed quickly, anywhere, at any time and on any device; local hard drive storage is better for accessing large amounts of data, without slow downloads.
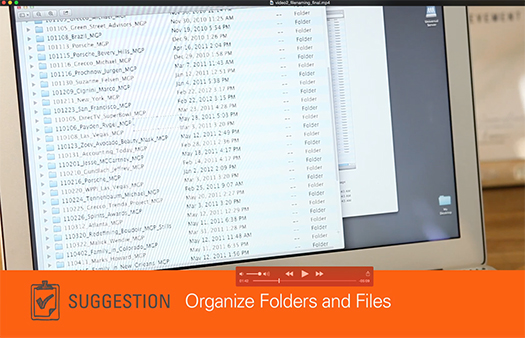
Naming Your Photos
A good file-naming system for photos is essential if you want to find them quickly, like when clients want prints or additional licensing. Here’s my four-step file-naming system:
1. Start a file name with the session’s date to keep files in a hierarchical numeric order.
I reverse the date, using the year, then month, then day. For example, “20140131” would be for January 31, 2014. This is then separated from the next chunk of file information with an underscore.
2. Include the subject name.
This is the backup if you don’t have paperwork telling you what date you shot it. For portraits, I use a “last name, first name” scenario; if you shoot weddings, you might want to use the couple’s last name.
3. Use an acronym for your company.
Mine is MGP, for Michael Grecco Photography. Since I often send my clients files from which to edit, I want to be able to identify my work from everyone else’s images.
4. Add the camera file number in the name.
We never shoot just one frame, so files need individual identifiers to differentiate them. I use a four-digit sequence because going past 9,999 in one day for me is very unlikely.
To see Grecco’s list of “5 Archiving Pitfalls to Avoid,” click here.
Related Links:
The Future of Storage: Portable, Durable Solid-State Drives
Related Articles
GigaDrive’s External SSD: “Breaking Speed Records”
March 24, 2021
As megapixel counts climb, speed and available storage space declines. But one startup is aiming to bring innovation to external hard drives right out of the gate. GigaDrive is, according to the startup of the same name, “the fastest external SSD in the world” that claims to be not only breaking speed records, but is also purported to be small...
More »
New from NanLite and Sigma, plus Sony Card Replacement
June 22, 2020
Two LED Monolights from NanLight, Sigma's full-frame 100-400mm lens, plus Sony's card replacement news.
More »
10 Awesome Portable and Stationary Storage Drives
October 29, 2019
From tiny SD cards to multi-bay drives for home, these tools will keep your files safe and sound.
More »
