
Software
Software Review: Hands-On With Macphun Luminar
March 22, 2017
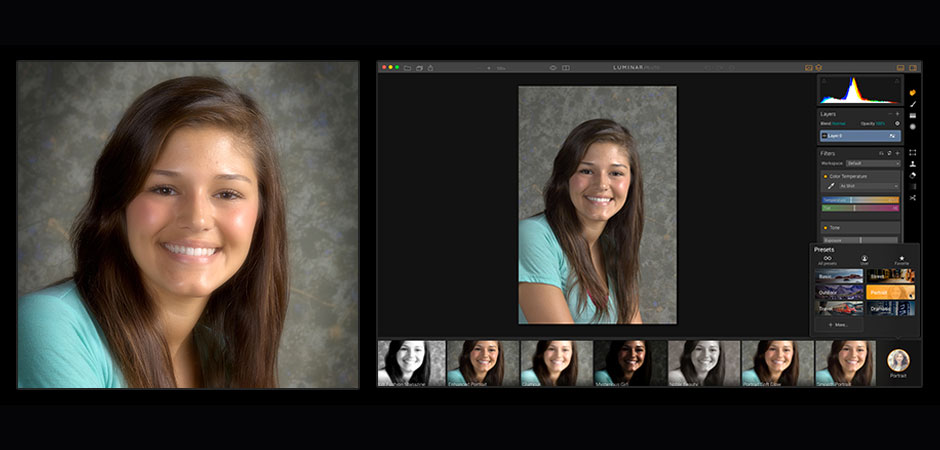
Built into Luminar are presets (right) for different areas of photography—including basic, street, outdoor, portrait, travel and dramatic—that can help lead to a final output (left). Other preset groups are available free or at low cost from the Macphun website.
With the release of Luminar, Macphun has moved from its previous emphasis on apps and plug-ins to an all-purpose image-editing program designed to go head-to-head against Adobe Photoshop and Lightroom. While falling short in a few areas, Luminar succeeds brilliantly in others, offering Mac users a viable alternative to Adobe software and other Mac image editors.
In line with other Macphun products, Luminar offers presets to get new users up and running quickly or for quick edits, as well as filters. It features a non-destructive workflow, RAW file processing and conversion, layers with blend modes, masking, workspaces for specific types of photography, and the ability to customize and save workspaces for an individual photographer’s future use. You can save edited images in Luminar’s proprietary file format, preserving all edits, layers and history, or export the image in common file formats, including PSD, but without the layer information.
Luminar functions as a standalone program, but you can also install it as a plug-in to Photoshop, Lightroom, Photoshop Elements, Aperture and Apple Photos. You can open an image in Luminar by right-clicking the thumbnail in Adobe Bridge, too. The $69 perpetual license allows installation on up to five Macs. While I installed Luminar 1.1.0 as both a standalone and as plug-ins to the other programs, I worked mainly with the standalone. I did find that its functionality as a plug-in is identical, with the obvious difference that it sends you back to the master program for saving or output.
User Friendliness
As with any new program, the user interface takes some getting used to, but it’s not like opening Photoshop or even Lightroom for the first time. Once you have selected and opened an image, you can resize the workspace to your liking and quickly begin working. Users familiar with other Macphun products will be immediately comfortable. New users can catch on quickly by clicking on the various icons or hovering their mouse over them for a pop-up explanation of its function. Anyone needing further instruction can access the user guide or a wide range of excellent video tutorials through the Help menu.
The interface itself is, quite frankly, beautiful. Presets appear below the preview window and the adjustments (filters) associated with each preset are found in a pane in the right panel. Clicking an icon in the top right of the menu bar hides the presets and puts you into the advanced mode where you can populate the filter pane with the adjustments you want to apply to the active layer. You can add as many adjustment or new image layers as you would like, blend the layers in all possible ways and merge images together with easily created, but simple, masks. You make any refinements you feel are necessary to the adjustment in each filter by moving the appropriate slider as you would in other imaging programs. Very simple, intuitive and elegant.
What We Liked
For an initial release, I found little to criticize regarding either the user interface or the included tools. There is a histogram that you can cycle through to see the contribution from each of the primary colors and luminance, and you can also display highlight and shadow clipping warnings. The filter sliders have sufficient range for any adjustment I needed to make.
The batching of filters into a workspace is an interesting approach, but my work doesn’t usually lend itself to repeated application of the same adjustments. I found myself populating the filters pane with a rough selection of the filters I normally use for adjustments. Since I could easily turn the filters off and on within the panel, I imagine in time I would likely populate the filter pane with many of them and end up with a Lightroom-type right panel.
One quirk to Luminar that I can’t decide if I like or not is the ability to add a mask to make local adjustments. I like that you can add any global adjustment locally, including sharpening and noise reduction. The way you do this is to add a new adjustment layer, apply the adjustment you want globally and then paint a mask over the local area you want to adjust. This creates a layer mask revealing the adjustment on the local area and hiding it from the rest of the image. This same process is used to combine images. As counterintuitive for me as I found this process at first, it does work.
What We Didn’t Like
What I discovered as I was working with the various adjustments is that they often do more than their title suggests. For example, noise reduction seems to also have a hidden clarity, or at least a sharpening effect. A shadows adjustment tool not only increases shadow information, it also adjusts saturation and sharpness at the same time. While this can be helpful to many users, I would prefer to make these secondary adjustments on my own and in the amounts I wanted if I felt them necessary. I’m sure this “artificial intelligence” aspect will find its way into many image-editing software programs in the future, but I don’t really look forward to it.
While Luminar generally delivered to my satisfaction on the features included, I was disappointed in the features it lacked. There are really no selection tools. Making a selection is handled by masking, which is at best rudimentary. While you can have several images open in the program at once, you can only view them one at a time, and only by using the Window menu, not by clicking tabs as in Photoshop.
Luminar’s Clone Stamp tool works okay, but it is literally that: not a healing brush, nor does it have content-aware capability. In version 1.1.0, Luminar lacks lens corrections, a dehaze and red-eye removal filter, perspective correction, and above all, the equivalent of Lightroom’s Library module to do file organization, rating, adding metadata, etc. These are all promised for the future but are shortcomings at present.
How It Compares
Luminar in its current form is a mix of features from Photoshop, Camera Raw and Lightroom—only considerably less expensive. Like Photoshop, it can only process one image at a time; there is no Lightroom equivalent to adjusting one image and pasting those adjustment on others. Luminar is capable of processing RAW files, but the camera selection is more limited than Camera Raw and Lightroom, and medium-format backs are notably not supported. It lacks the image cataloging capabilities of Lightroom as already mentioned but includes some adjustments not available in Lightroom, such as a channel mixer, a color balance filter, a high key filter and more.
As Luminar matures, it seems likely that it will move closer to supplying the capabilities of other image-enhancement software. It will be interesting to see if it can mature while keeping the user-friendliness that it now has.
Stan Sholik is a photographer based in Santa Ana, CA, specializing in still-life and macro photography. His latest book, Shoot Macro, for Amherst Media is now available.
Related Articles

Infinite Color: Color Grading Photoshop Tool with Infinite Options
June 13, 2024
Working as a retoucher, one of the hardest parts of my job wasn’t even the clean up work that an image typically requires, it was the color grading. Applying a specific look to an image to really enhance or create a mood that meets the client’s vision was either doable or really hard. There was never a time when it...
More »

Adobe Max Roundup: Exciting New Features
October 19, 2023
Adobe Max, the company’s annual creativity conference, has just ended, leaving the latest innovations and features across Creative Cloud. You can revisit many of the keynotes and presentations on the Adobe site, but we’ve put together a quick overview of some of the most exciting photo and video news. Lightroom Most of the new features are available for all Lightroom...
More »

Nikkor Z Releases New Lenses & Tether Tools Updates Software
June 30, 2023
Nikon Z 70-180mm f/2.8 Good news for Nikon Z shooters! Nikon has added two new lenses to its Z-series line: the Nikkor Z 70-180mm f/2.8 and the Z 180-800mm f/5.6-6.3 VR. While the latter is best left to wildlife and sports photographers, we think that the Z 70-180mm f/2.8 model looks like a solid lightweight alternative to its more established...
More »
