
8 Tips for Illuminating Cinematography
April 17, 2015
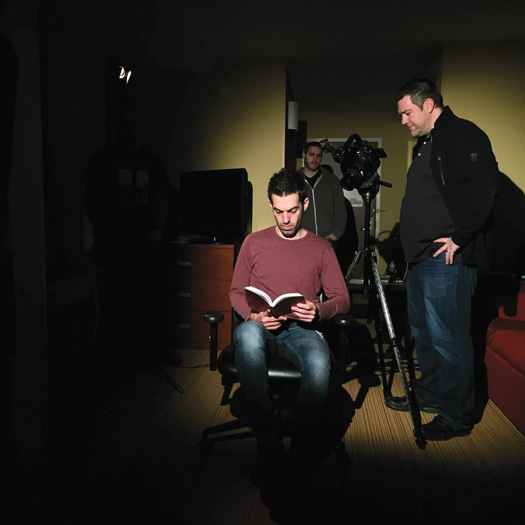
In a perfect world, a cinematographer at a wedding or event would have total control over the lighting of their work. But there is no such perfect world, says Adam Forgione, creative director of Pennylane Productions, a wedding and event film company based in Commack, New York. “Lighting a room from a design standpoint—for the human eye—and lighting for a film or photography standpoint are two different animals,” Forgione says.
Usually videographers have no control over ceremony lighting, and must contend with entertainment and venue illumination that is less than filmworthy. Thus Forgione advises adaptation and cooperation. “The goal for every vendor—whether it’s a photographer, a cinematographer, a makeup artist or a limo driver—is to do the best job they can for their client, and to work as a team so the client gets the best collaboration,” he says. “You’re in charge of your part.” Here are Forgione’s eight tips for mitigating those video light challenges with creative solutions.
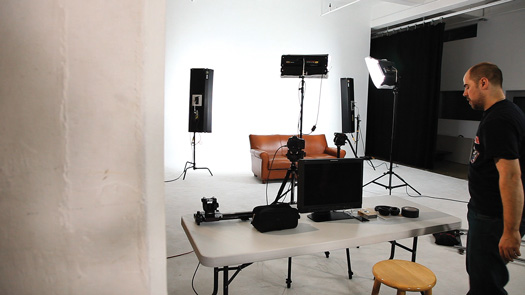
The setup for a RØDE Microphones commercial shoot using Kino Flo 4Bank and Diva-Lite 201 lights. All photos courtesy Pennyland Productions
1. Plan Ahead
Size up lighting options when you arrive at a venue to shoot.
“Right away, I look around at all the lights in the room, and all the windows,” Forgione says. “It’s an art in itself to tweak the environment to make it look better for [the clients] on film—and at the same time not affect their experience in a negative way. It helps to communicate about your goals with the other vendors.”
.jpg)
Available window light acts as a softbox. “Notice the soft shadows between light and dark on her face,” Forgione says.
2. Master Available Light
Locate areas where outdoor lighting can be used.
“A window is like a softbox with the purest light on Earth—the sun is bouncing down from space, hitting the ground, lighting the world outside the room, and the light is softly coming in,” Forgione says. “If we shut every single light off in the room, we can sculpt the light and work with it. You can’t move the window, but you can ask your subjects to turn and face more toward or away from the natural light.”
An example of a dramatic shot using hard light (a Dedolight DLH-4 150W spotlight with hard edges.
3. Utilize Artificial Light
Adapt to interior lights being used at the event.
“We’re talking about actual lights in the room—the lamps, the overheads,” Forgione says, “because you can’t always set up your own lights. So you start to shape the room so your images look better, mainly by avoiding ‘mixed lighting’—both available and artificial combined. You want to stay with one or the other.”
.jpg)
4. Try Three-Point Lighting
When you can control your lights, go for the classic look.
“Your key light, on the majority of the subject or object, is the brightest light in front,” Forgione says. “The fill light, usually on the opposite side, brings in the shadows—it gives a little lift to the other side. And then you have the hair light or back light, behind the subject, either 180 degrees from the key light or 180 from the fill light, which lights the outline of the body. The three together give you more structure.”
5. Pay Attention to Color Temperature
Choose between cooler and warmer tones.
“Outdoor lighting, around 56K, is a cooler, bluer look,” Forgione says. “Indoor lighting that is incandescent, like a 32K, gives you a warmer look. When you mix the warm and the cool together on skin tones, it looks bad, especially in cinematography. The only time I purposely use mixed lighting is if I light part of a scene as the key light color and there is a background object lit at a different color temperature—let’s say a window lighting the main subject—and then a lamp in the background that is much warmer in color temperature that helps to color the background with a warmer tone.”
.jpg)
6. Learn How to Soften Light
For a softer look, diffuse it.
“If you can’t push your light away from the subject, you can diffuse it—with expensive items or cheap ones,” Forgione says. “You can use diffusers and softboxes that cost thousands of dollars; you can also take a bed sheet and put it over a light, and it’s a beautiful diffusion. Or you can bounce it: If you have a white ceiling, hit the light off the ceiling and let it bounce down, so it reflects and sprays with a softer look.”
7. Create the Dramatic Look
Use contrast and shadows to your advantage.
“If I knew I was going to score a film to a grand, epic, Hollywood-traileresque song, I would go for a dramatic look, with harder lines between light and shadow,” Forgione explains. “The way to create is to get the light to come in at one narrow angle, hitting one side of the face, so one side is illuminated and the other side is darker. You can intensify the light or bring it closer to the subject, and you’ll see the line between light and shadows getting sharper and sharper.”
8. Steer the Spotlight
Highlight key moments with a direct projection.
“The bigger the light, the broader and softer the look. The smaller the light, the more direct and spottier the look,” Forgione says. “You want one or the other. With speeches, such as the toast to a couple, you can put a tight spotlight in the corner of the room and light up the speaker. I’ll say to them, ‘Don’t wander from this circle. If you stay in this area, I’ll make you look like a rock star!’ And they always smile. ‘Of course, I want to be a rock star—I’ll do what you say.’ ”
Related Links
Bright Lights, Big Impact: Breaking Down 4 Setups Behind Signature Styles
Two Doable and Affordable Ways You Can Capture 4K
Related Articles

Why Felix Kunze Thinks We’ve Been Overcomplicating Lighting (And What He’s Doing About It)
July 24, 2025
When it comes to lighting in photography, most of us instinctively reach for soft, flattering light. We diffuse our flashes, shoot through umbrellas, and seek out cloudy days. But what if I told you that some of the most striking portraitYou know the moment: your subject is ready, you’ve got about five feet of space to work with, and the...
More »

How to Photograph Fireworks for Couples Portraits
October 24, 2024
Fireworks aren’t just for the Fourth of July! You’ll find them regularly at theme parks, sporting events, and maybe more surprisingly, at weddings. For the latter, fireworks offer photographers a wonderful opportunity to capture epic couples portraits with a truly unique backdrop. Of course, if you’re not familiar with how to photograph fireworks, there are some basic tips you’ll want...
More »

Why Top Photographers are Embracing Hard Light (And You Should, Too)
October 23, 2024
When it comes to lighting in photography, most of us instinctively reach for soft, flattering light. We diffuse our flashes, shoot through umbrellas, and seek out cloudy days. But what if I told you that some of the most striking portraits actually come from embracing hard light? That’s exactly what renowned photographer Roberto Valenzuela teaches in his groundbreaking new Dynamic...
More »
